The Ultimate Guide to the Epic Grand Canyon Rim-to-Rim Hike

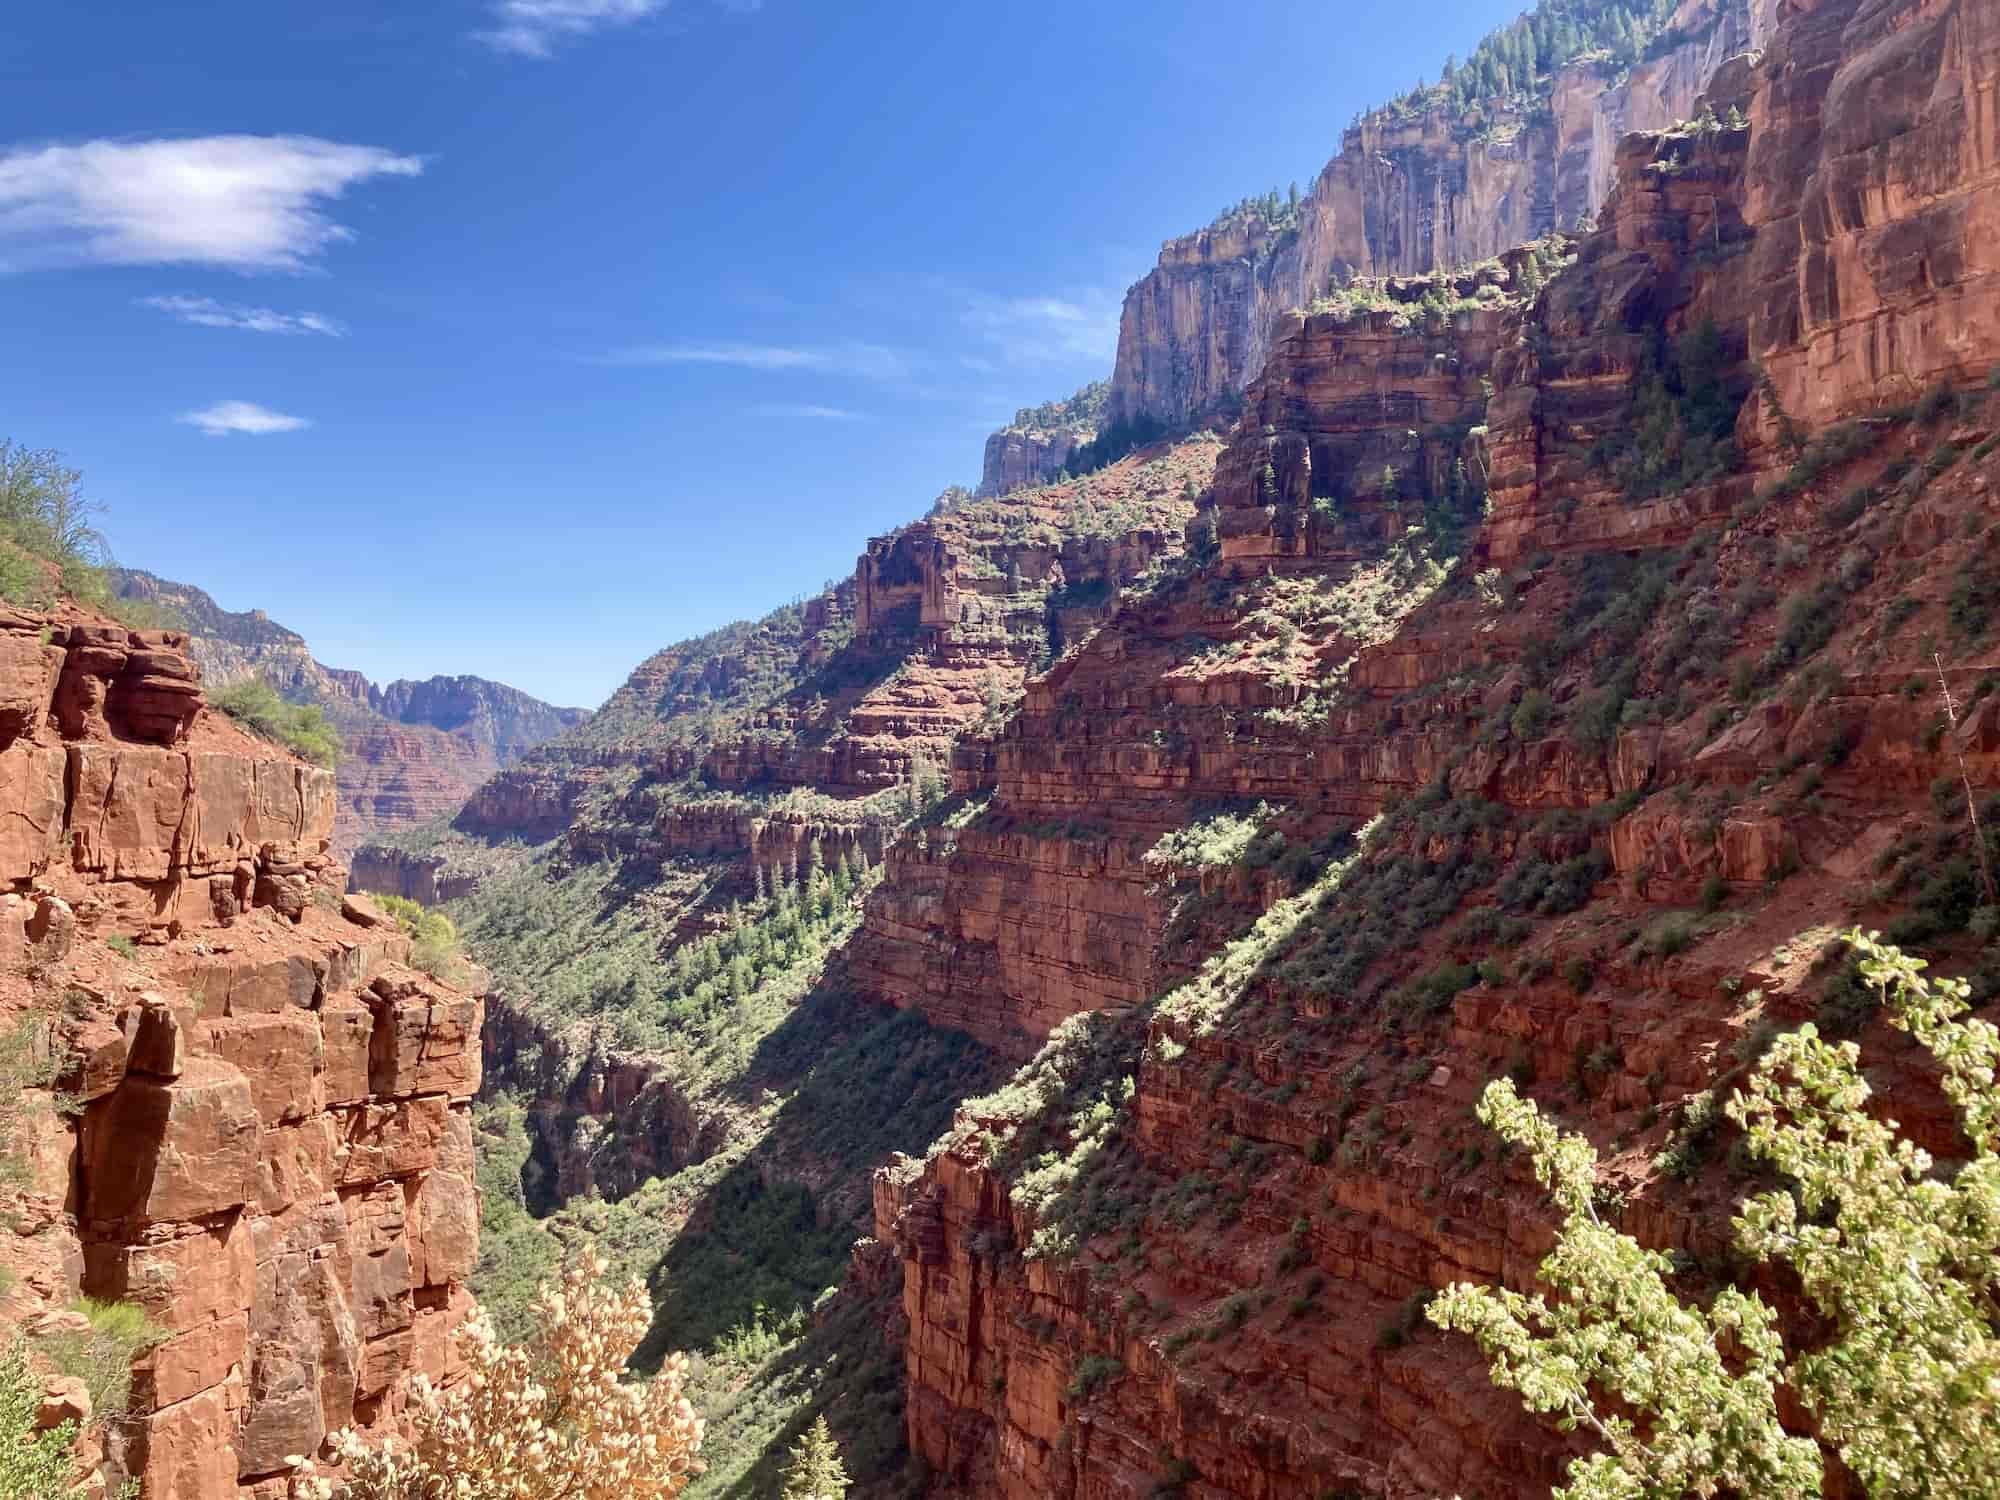
The majesty of the Grand Canyon attracts crowds of people, but did you know that less than 1% of the nearly 6 million annual visitors to the Grand Canyon go below the rim? And an even smaller fraction of that experience the entire canyon on the Grand Canyon Rim-to-Rim hike.
But if you’re looking for an adventure of a lifetime that offers unique views of the incredible landscape of the Grand Canyon and areas that few people get to see while also challenging you both mentally and physically, hiking the Grand Canyon Rim-to-Rim will fulfill your dreams.

WHAT WE WILL COVER IN THIS GUIDE:
Hiking the Grand Canyon Rim-to-Rim is not easy, physically, mentally, or logistically. But we’ve designed this guide to give you all the comprehensive information you need to make planning the logistics less overwhelming.
In this post, we will go over all of these important details to help you plan and prepare for your very own successful Grand Canyon Rim-to-Rim hiking adventure:
Grand Canyon Rim-to-Rim Trail Stats - All the nitty gritty details for the trail in one spot, including mileage, elevation gain, & more.
Which Direction to Hike the Grand Canyon Rim-to-Rim - The pros & cons of hiking from the North Rim to the South Rim and vice versa.
Day Hiking the Rim-to-Rim vs Backpacking the Rim-to-Rim – Definitely some pluses & minuses to each option.
Best Time to Hike the Grand Canyon Rim-to-Rim – Details about the best time to take on the Grand Canyon Rim-to-Rim hike and typical weather to expect on your trip.
Grand Canyon Rim-to-Rim Hike Map & GPX Files - I've created a map detailing the whole trail that you can explore, including a look at the elevation gain/profile of the hike. You can also download this file as a GPX file to upload into your own personal GPS device.
How to Get to the Grand Canyon Rim-to-Rim Trail – Driving and parking recommendations for both the South & North Rim of the Grand Canyon.
Grand Canyon Rim-to-Rim Camping – Where to camp on and off the trail when visiting.
Itinerary for Hiking the Grand Canyon Rim-to-Rim Trail - I’ll walk you through my experience and suggested itinerary for hiking the Grand Canyon Rim-to-Rim.
Important Grand Canyon Rim-to-Rim Safety Tips – How to be prepared for and handle the top hazards on the trail.
What to Bring on Your Grand Canyon Rim-to-Rim Hike – The essential packing list for the Grand Canyon Rim-to-Rim hike. Don’t hit the trail without these things!
If you’re looking for something specific, feel free to skip ahead to the section you need!
Plus, be sure to check out the bottom of this post to find more desert hiking trail guides and other additional hiking, camping and backpacking resources!
GRAB MY [FREE] OUTDOOR BACKPACKER STARTER KIT
I created the Ultimate Outdoor Backpacker Starter Kit for you (and it's FREE)! This starter kit is filled with 14 pages of my best hiking and backpacking tips to help you learn what it takes to become a safe, confident, and self-sufficient outdoor backpacker!
1. GRAND CANYON RIM-TO-RIM TRAIL STATS
Here are the basic stats and important information about the Grand Canyon Rim-to-Rim hike so you can quickly figure out what this hike is all about.
The Grand Canyon Rim-to-Rim can be hiked a few different ways, with slightly different mileage and elevation gain for each. That is noted here, and we’ll get into more details about the Rim-to-Rim trail options in the next section.

GRAND CANYON RIM-TO-RIM TRAIL QUICK FACTS
Trail to Summit: Bright Angel or South Kaibab to North Kaibab (or vice versa)
Type of Trail: Point-to-Point
How long is the Grand Canyon Rim-to-Rim Hike: 21-23.5 miles depending on route (Check out Section 5 ‘Grand Canyon Rim-to-Rim Hike Map, Itinerary, & GPX File’ for more details.)
Total Elevation Gain: 4,460 to 5,850 feet, depending on route
Grand Canyon Rim-to-Rim Trailhead: Bright Angel, South Kaibab, or North Kaibab
Trailhead Elevation: Bright Angel - 6,850 ft/South Kaibab - 7,260 ft/North Kaibab - 8,241 ft
How long does it take to hike the Grand Canyon Rim-to-Rim? Day hiking generally takes in the range of 12-15 hours, while backpacking is typically 2-3 days.
Grand Canyon Rim-to-Rim Crowds: Very crowded, especially closer to the rims – the South Rim is more crowded than the North. The crowds thin as you get deeper in the canyon, but you’ll still encounter lots of people.
Do you need a permit to hike the Grand Canyon Rim-to-Rim? No, but you do need a backcountry permit if you plan to camp at one of the campgrounds along the trail.
How difficult is hiking the Grand Canyon Rim-to-Rim? Extremely strenuous with a ton of mileage and elevation gain.
How dangerous is hiking the Grand Canyon Rim-to-Rim? While the trail itself isn’t technical or even too exposed, the combination of mileage, elevation gain, and extreme heat can be very dangerous if you are not well-prepared.
How do you train for the Grand Canyon Rim-to-Rim hike? You definitely want to be in shape for this hike, so it’s a good idea to start training a few months before your rim-to-rim hike. Hiking is the best training, and you should ramp up your mileage & elevation gain as you go.
Is there drinking water available along the Grand Canyon Rim-to-Rim hike? There is usually filtered water available on the Bright Angel Trail and the North Kaibab Trail, although you need to check with rangers ahead of time to make sure the water is turned on. There is also lots of access to river water that you can filter. However, there is NO WATER on the South Kaibab Trail.
Is hiking the Grand Canyon Rim-to-Rim dog-friendly? No, dogs are not allowed below the rim of the canyon.
Is the Grand Canyon Rim-to-Rim hike kid-friendly? No. While it is possible to backpack the Grand Canyon Rim-to-Rim with kids, this is a very strenuous hike that would only be suitable for older children who are experienced hikers.

2. WHICH DIRECTION TO HIKE THE GRAND CANYON RIM-TO-RIM
You can start from either the South or the North Rim to hike the Grand Canyon Rim-to-Rim. Each direction has its advantages and disadvantages, which we’ll go over here.
SOUTH RIM TO NORTH RIM
Two trails to the bottom of the canyon begin at the South Rim - the South Kaibab Trail and the Bright Angel Trail. The South Kaibab Trail is shorter and steeper, while the Bright Angel Trail is a couple miles longer for a slightly gentler descent. At the bottom of the canyon, they both connect with the North Kaibab Trail which takes you up to the North Rim.
The main advantage of hiking the Grand Canyon Rim-to-Rim from south to north is that you can take the shorter South Kaibab Trail down in the early morning when it’s less hot, which will make your total mileage around 21 miles as opposed to 23.5 miles if you combine the Bright Angel and North Kaibab.
It’s not a good idea to take the South Kaibab trail up out of the canyon if you start the other way because there is no water available on the trail.
NORTH RIM TO SOUTH RIM
The only trail down from the North Rim is the North Kaibab Trail. You’ll most likely want to head up the South Rim on the Bright Angel Trail because it has water along the way, and the South Kaibab does not.
The main advantage of hiking the rim-to-rim from north to south is that you will have less elevation gain since the North Rim is higher than the South Rim. However, you will be descending farther, so keep that in mind if descents are typically hard on your knees. Also, you will end up doing more mileage this direction if you hike out on the Bright Angel Trail.
Another thing to consider is that the North Rim typically opens on May 15th each year and closes mid-October. When I planned my recent Rim-to-Rim hike, we were originally going to start from the North Rim, but since we were doing the hike on May 15th, the North Rim actually did not open early enough for us to start when we wanted to.
3. RIM-TO-RIM DAY HIKING VS. BACKPACKING
While the National Park Service discourages people from doing the Grand Canyon Rim-to-Rim hike in one day, plenty of people still complete the trail this way. But backpacking the Rim-to-Rim is also a great and less intense option.

DAY HIKING
Doing the Grand Canyon Rim-to-Rim hike in one day is a huge challenge that requires lots of training and preparation. It is an extremely committing hike, because as the Grand Canyon NPS warns hikers, “Down is optional. Up is mandatory.”
No matter the route you take, you will hike AT LEAST 20 miles with 5,000-6,000 feet of elevation gain. And it will most likely be warm to very hot on a trail with very little shade, making this an extremely strenuous day hike.
BACKPACKING
The best thing about backpacking the Grand Canyon rim-to-rim is that you get to split up your time on the trail into multiple days. It is still a difficult hike – especially since you’ll have a heavier pack for backpacking – but it does make it more manageable.
However, planning to backpack the rim-to-rim is even more logistically complex than day hiking (which is already somewhat complicated!) because you will need to have backcountry permits in order to camp below the rim of the Grand Canyon.
There are several campground options below the rim, as well as Phantom Ranch at the bottom of the canyon by the Colorado River. Where you stay will depend on how many days you want to make your backpacking trip. We will discuss more about the campground options in Section 7 below.
4. BEST TIME TO HIKE THE GRAND CANYON RIM-TO-RIM
The key to hiking the Grand Canyon Rim-to-Rim is to avoid the heat, and since it’s located in the Arizona desert, you definitely DON’T want to hike the Rim-to-Rim in the summer. During the summer, temps at Phantom Ranch at the bottom of the canyon can easily reach well over 100ºF.

However, the North Rim trailhead is only open from May 15th to October 15th each year, which limits the time you have to hike the Rim-to-Rim in reasonable temps.
The best time to hike the Rim-to-Rim is probably early October. You can also try for May as soon as the North Rim opens, but it still might end up being super hot. When we hiked it on May 15th a few years ago, the temps reached 105ºF at Phantom Ranch!
Check out the Grand Canyon weather average temperature map below for reference.

Be prepared before you go. Just like I teach my students in my backpacking program. It’s important that you research your weather conditions before you go, weeks and days before your trip. You can check the weather conditions at one of the following resources:
Grand Canyon Weather Conditions – This NPS page provides a daily overview of the weather in the Grand Canyon.
Phantom Ranch Forecast – It’s key to check the weather at Phantom Ranch at the bottom of the Grand Canyon, since that is where it is hottest, while the rims can be significantly cooler.
Heat in the Grand Canyon: Watch out for excessive heat warnings in the Grand Canyon. It can be extremely dangerous to attempt the Rim-to-Rim hike in excessive heat. The hottest part of the Grand Canyon is known as “The Box,” and you want to avoid being in that area during the hottest part of the day (generally 10am-4pm).
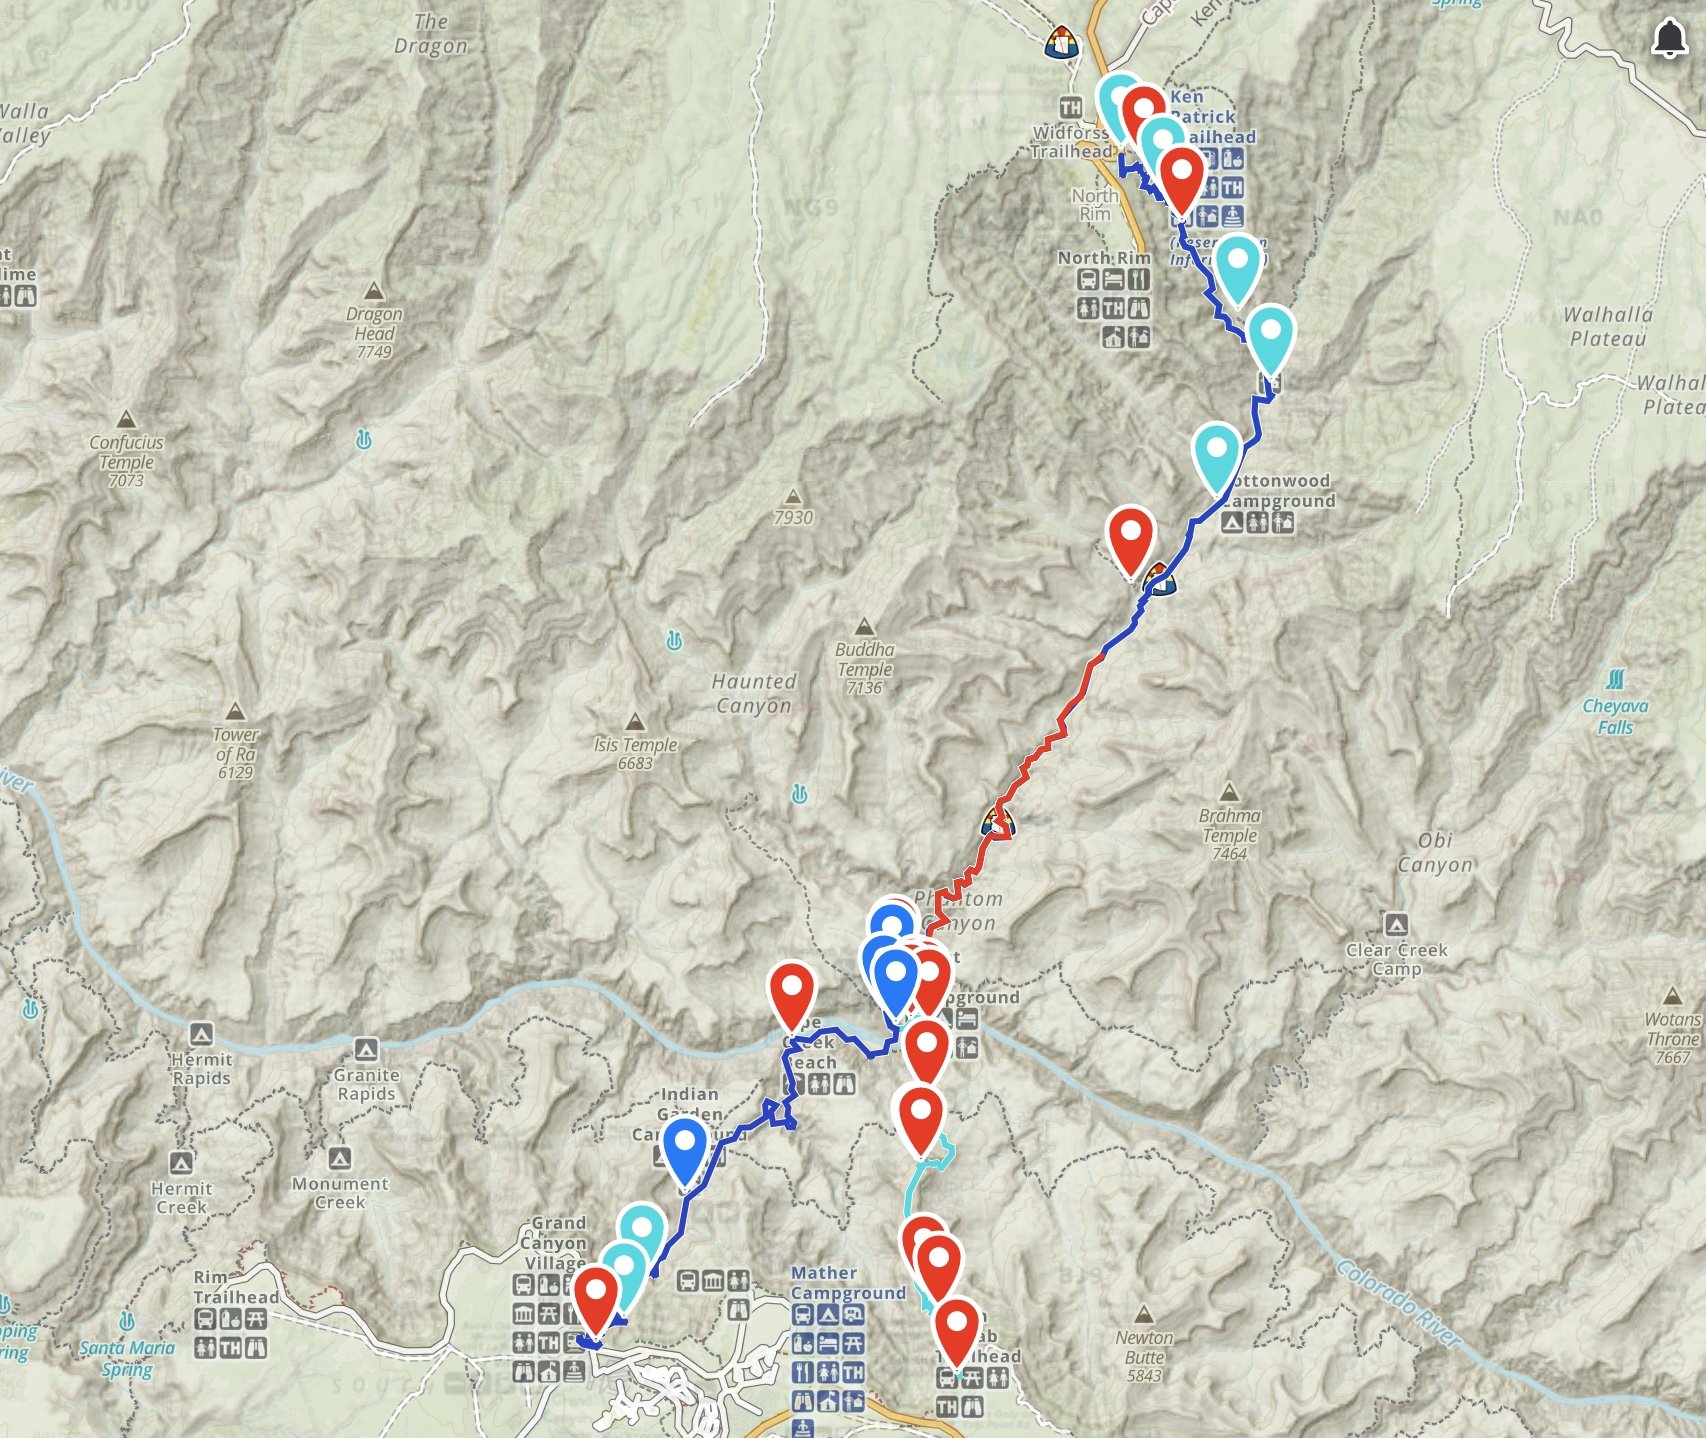
5. GRAND CANYON RIM-TO-RIM HIKE MAP & GPX FILES
No matter which trails you choose to take on your Grand Canyon Rim-to-Rim hike, the trails are straightforward, well-marked, and easy to follow, with only a few junctions along the way.
Still, I always recommend downloading a GPX file onto a GPS device, that way you can check in from time to time to be sure you’re on the right trail.
You can download the GPX files for the Grand Canyon Rim-to-Rim map below. It details all the key milestones of the hike including the trailhead start, Phantom Ranch, and more.
DOWNLOAD THE GRAND CANYON RIM-TO-RIM GPX FILES FOR YOUR GPS HERE:
Knowledge is power my friend, and I'm a girl who loves data. Get access to this trails GPX file PLUS my library of GPX files with tracks and waypoints for all the trails loaded onto the She Dreams of Alpine blog.
Load this puppy into your trusted GPS and rest easy knowing you have tracks to follow on your next hike or backpacking trip.
DON’T HAVE A GPS? YOU SHOULD.
I believe every hiker and backpacker should strive to be self-sufficient, and that includes knowing how to practice smart navigational skills in the outdoors.
This is an important safety skill set that I teach in-depth inside of my backpacking program. There’s no reason to risk getting lost in the outdoors.
Here’s what I recommend to get started:
(Note: This list contains affiliate links)
Gaia is offering a special 10% discount on a premium account to those who subscribe online through my link.
Don’t know where to start? If you need help with some Gaia GPS basics, download my quick Gaia GPS navigation 101 guide.
2) Get an SOS Device: Once you are able to, I recommend investing in some sort of SOS communication device like the Garmin inReach Mini or the Garmin inReach Explorer+ . These devices provide not only GPS tracking capabilities, but also an SOS satellite search and rescue communicator and text communication abilities in the backcountry.
My Go-To Trail Setup: The Gaia GPS app (premium subscription) + the Garmin inReach Mini.
Alternative to Garmin: Pair your Gaia GPS App with the Zoleo SOS device . With this set up, the Gaia GPS App serves as your GPS navigation device, and the Zoleo serves as an SOS/communication device.
Learn more about the best GPS devices for hiking here.
GRAND CANYON RIM-TO-RIM HIKE ELEVATION PROFILE
Here’s a look at the Grand Canyon Rim-to-Rim hike elevation gain profile. This is starting from the North Rim on the North Kaibab Trail and heading up to the South Rim via the Bright Angel Trail, so the elevation profile will be slightly different if you take a different route for your Rim-to-Rim hike.

>> JUMP TO SECTION 8 FOR A SUGGESTED GRAND CANYON RIM-TO-RIM TRAIL ITINERARY.
6. HOW TO GET TO THE GRAND CANYON RIM-TO-RIM TRAIL
The closest airports to the Grand Canyon are Phoenix and Flagstaff. Phoenix is a bigger airport with more flight options, but it is a 3.5 hour drive to the South Rim. The flights into Flagstaff are more limited, but the drive is only 1.5 hours to the South Rim.
The biggest logistical hurdle when planning a Grand Canyon rim-to-rim hike is that the South Rim is about a 4.5 hour drive away from the North Rim. So you need to plan ahead to figure out how to get back to where you started.
Some options include staging a car at the other rim, having someone meet you there, or taking a Grand Canyon Rim-to-Rim shuttle. The Trans-Canyon Shuttle provides transportation a couple of times a day during the season (May 15 - October 15) and can be reserved online.

GETTING TO THE TRAILHEADS
There are three different trailheads you can start at, depending on how you decide to hike the Grand Canyon rim-to-rim. Here is how to access each of them:
South Kaibab Trailhead: The South Kaibab Trail requires a shuttle to access, since no private vehicles are allowed to park there.
Bright Angel Trailhead: There is limited parking at the trailhead, but since Bright Angel Trail is the most popular trail in the park, it fills up very quickly. You can also park at the Backcountry Information Center, which is a 5-10 minute walk from the trailhead, or park at the Grand Canyon Visitor Center and take a free shuttle.
North Kaibab Trailhead: There is a small parking lot at the North Kaibab trailhead, which you can drive to when the North Rim is open (May 15 to October 15). The North Rim Campground is a half-mile walk from the trailhead.
7. GRAND CANYON RIM-TO-RIM CAMPING
If you decide to backpack the Rim-to-Rim hike, you will need to make campground reservations way ahead of time. And even if you’re doing the Grand Canyon rim-to-rim as a day hike, you might want to spend the night before or after your hike camping on top of one of the rims near the trailhead.
CAMPING NEAR THE TRAILHEAD (PRE-HIKE)
If you come in a day before your hike, you have a couple options for camping pre-hike, one on each rim.
Mather Campground: Located in Grand Canyon Village on the South Rim, Mather Campground is the closest option if you’ll be starting from the South Kaibab or Bright Angel Trailhead.
North Rim Campground: On the North Rim, you can get a site at the aptly named North Rim Campground, which is a half-mile hike from the North Kaibab Trailhead.

CAMPING ALONG THE RIM-TO-RIM TRAIL
There are three campgrounds below the rim of the Grand Canyon, as well as Phantom Ranch. If you plan to do the rim-to-rim as a 2-day/1-night backpacking trip, you’ll want to stay at either Phantom Ranch or Bright Angel Campground, which are down by the river and the closest to half way along the trail. The other campgrounds would be good options if you choose to do a longer backpacking trip.
Phantom Ranch: Located at the bottom of the Grand Canyon, staying at Phantom Ranch is a unique and coveted experience, which means you need to make a reservation or enter a lottery at least 13 months in advance to stay in one of the hiker cabins.
Bright Angel Campground: If you want to camp at the bottom of the canyon, Bright Angel Campground is your spot. It’s less than half a mile from the amenities at Phantom Ranch and is a pretty special place to camp right along Bright Angel Creek where it meets the Colorado River.
Havasupai Gardens Campground: This campground is located 4.8 miles below the South Rim and has potable water year-round.
Cottonwood Campground: This campground is 6.8 miles below the North Rim and has potable water seasonally (from mid-May to mid-October). The rest of the year, you will need to filter water from Bright Angel Creek.
A backcountry permit is required to stay at Bright Angel, Indian Garden, or Cottonwood Campgrounds. The NPS website has a table showing the earliest you can apply for a permit, which is generally 4 months in advance. Each permit costs $10 plus $15 per person per night of camping.

8. ITINERARY FOR HIKING THE GRAND CANYON RIM-TO-RIM TRAIL
As we’ve discussed earlier, there are a few different options for hiking the Grand Canyon rim-to-rim. Here, we will go over the itinerary for hiking the South Kaibab Trail to the North Kaibab Trail, since that is what I recently did.
Note: All the potable water sources mentioned here might not be turned on during your rim-to-rim hike. You can check the water status here, and it’s a good idea to check with park rangers as well to determine where water will be available. I would recommend always bringing a water filter or water treatment to fill up from a creek or river when hiking the Grand Canyon Rim-to-Rim, just in case.
A TYPICAL SOUTH KAIBAB TO NORTH KAIBAB HIKE ITINERARY
You’ll want to start EARLY for the Grand Canyon Rim-to-Rim hike! It’s important to be out of “The Box” (the hottest part of the canyon) before the hottest part of the day – especially if it’s an extra hot day.

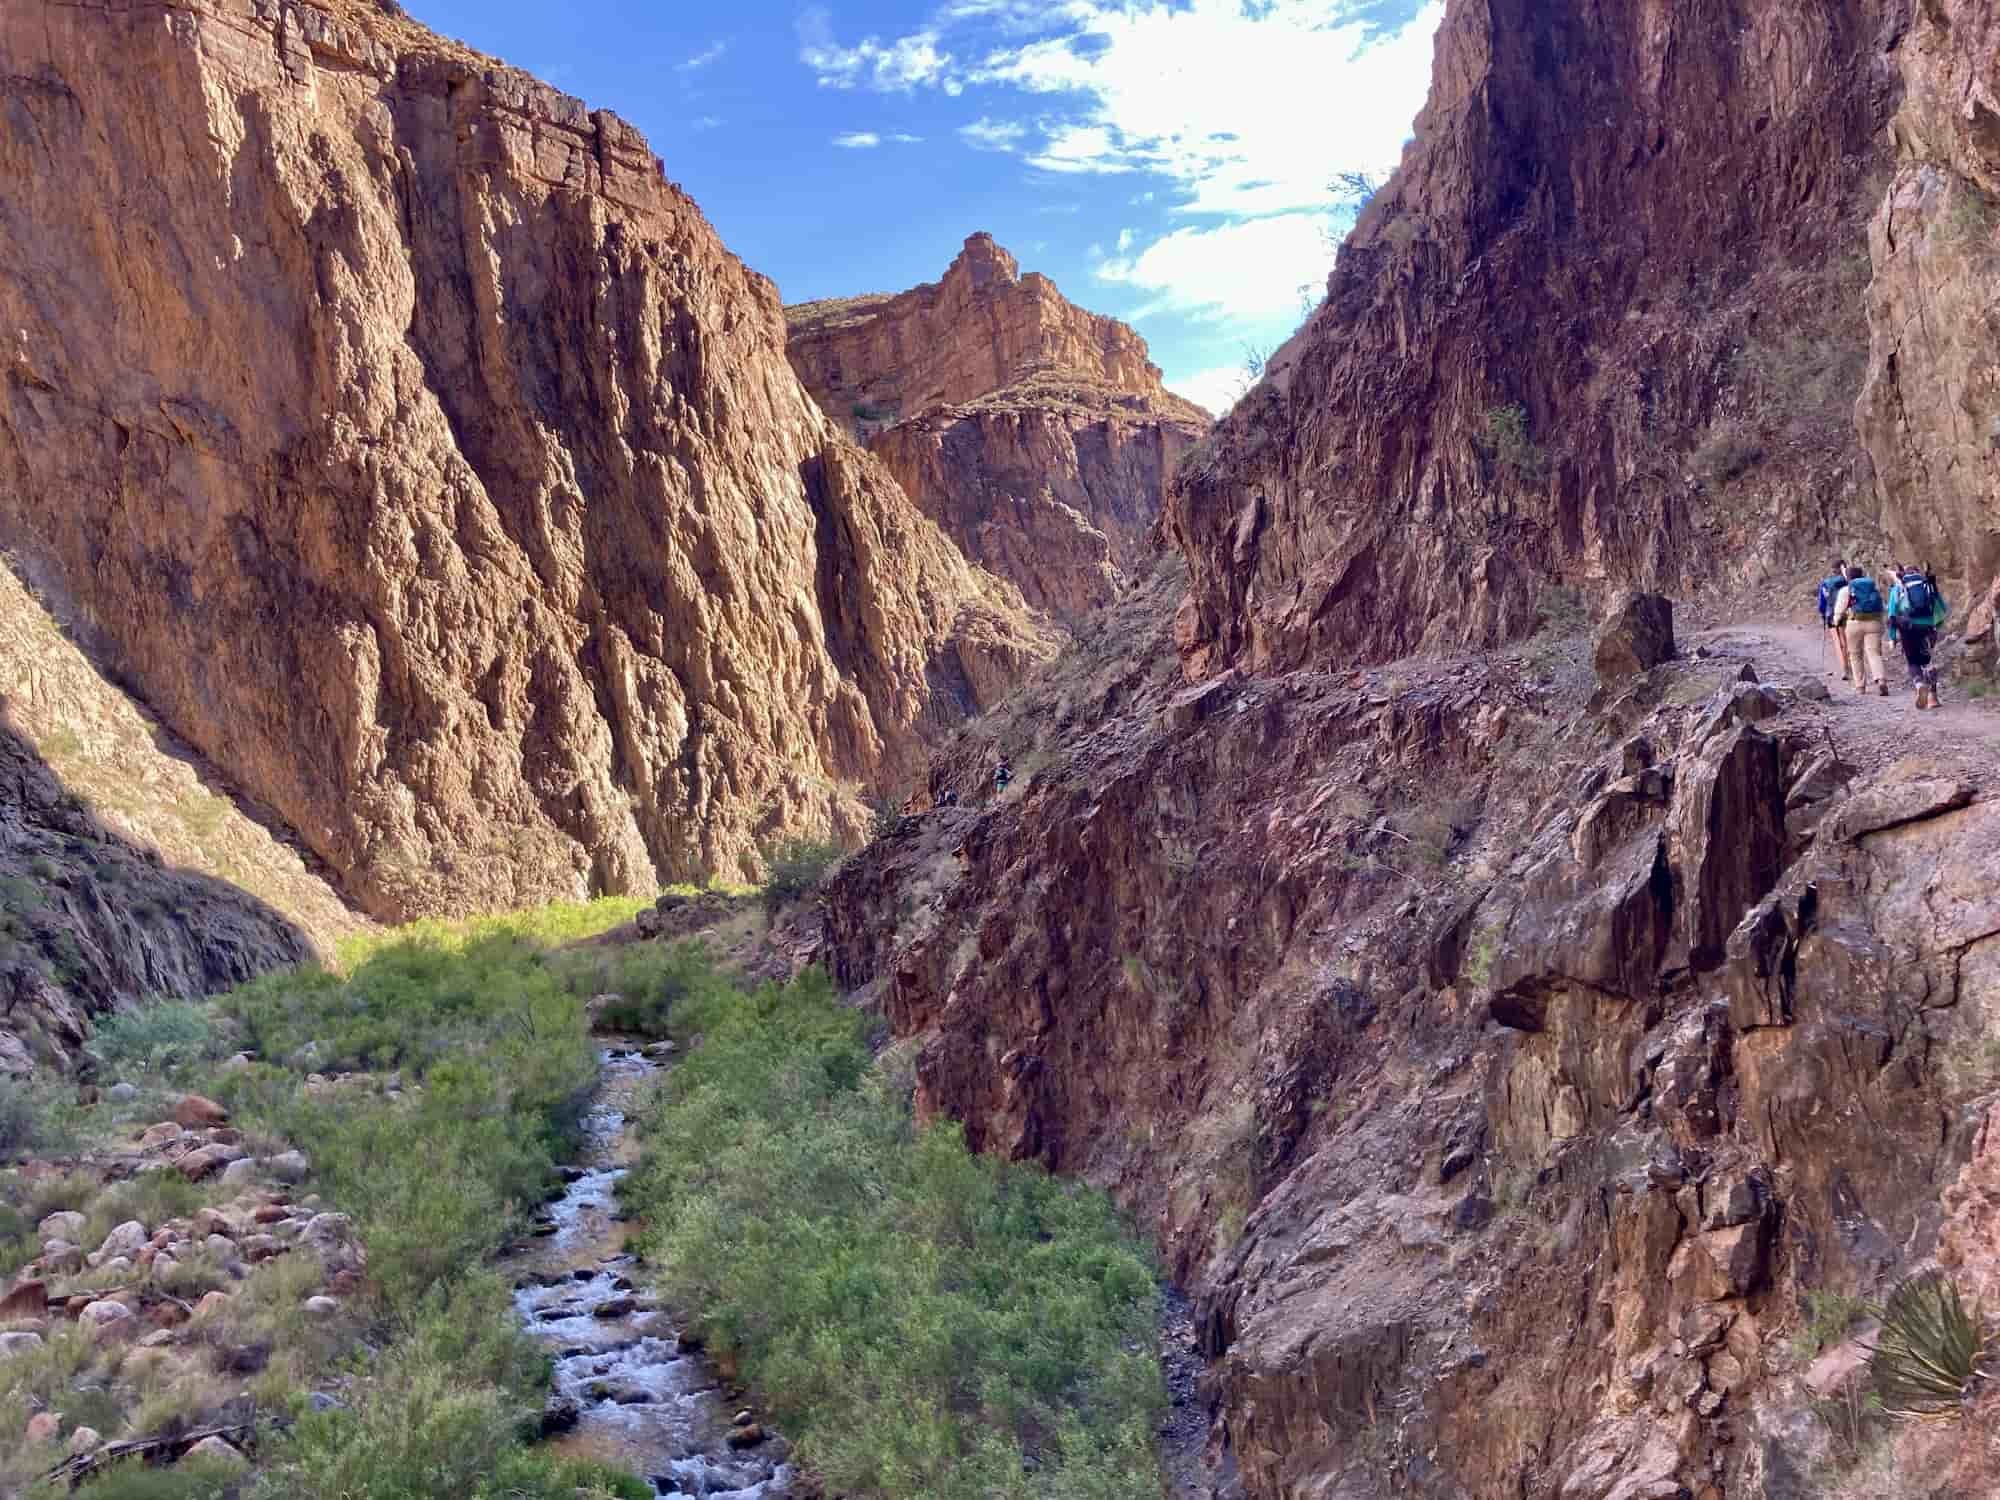
We started our hike from the South Kaibab trailhead around 1:30am. Headlamps are obviously necessary when you start well before sunrise! But as long as you have a headlamp the trail is easy to follow as you descend into the canyon.
You’ll pass Ooh Aah Point just about a mile in, but it probably won’t be light enough yet for you to take in the amazing views. A little farther along, you’ll hit Cedar Ridge, which has pit toilets if you need to stop.

Keep going down the steep switchbacks, and you’ll reach Skeleton Point about 3 miles into your hike, which offers your first view of the Colorado River at the bottom of the canyon.
After Skeleton Point, just keep heading down! Eventually, you’ll round a corner and get a truly breathtaking view of the river with the canyon walls surrounding it. Continue on and you’ll see the first sign pointing you toward Phantom Ranch.
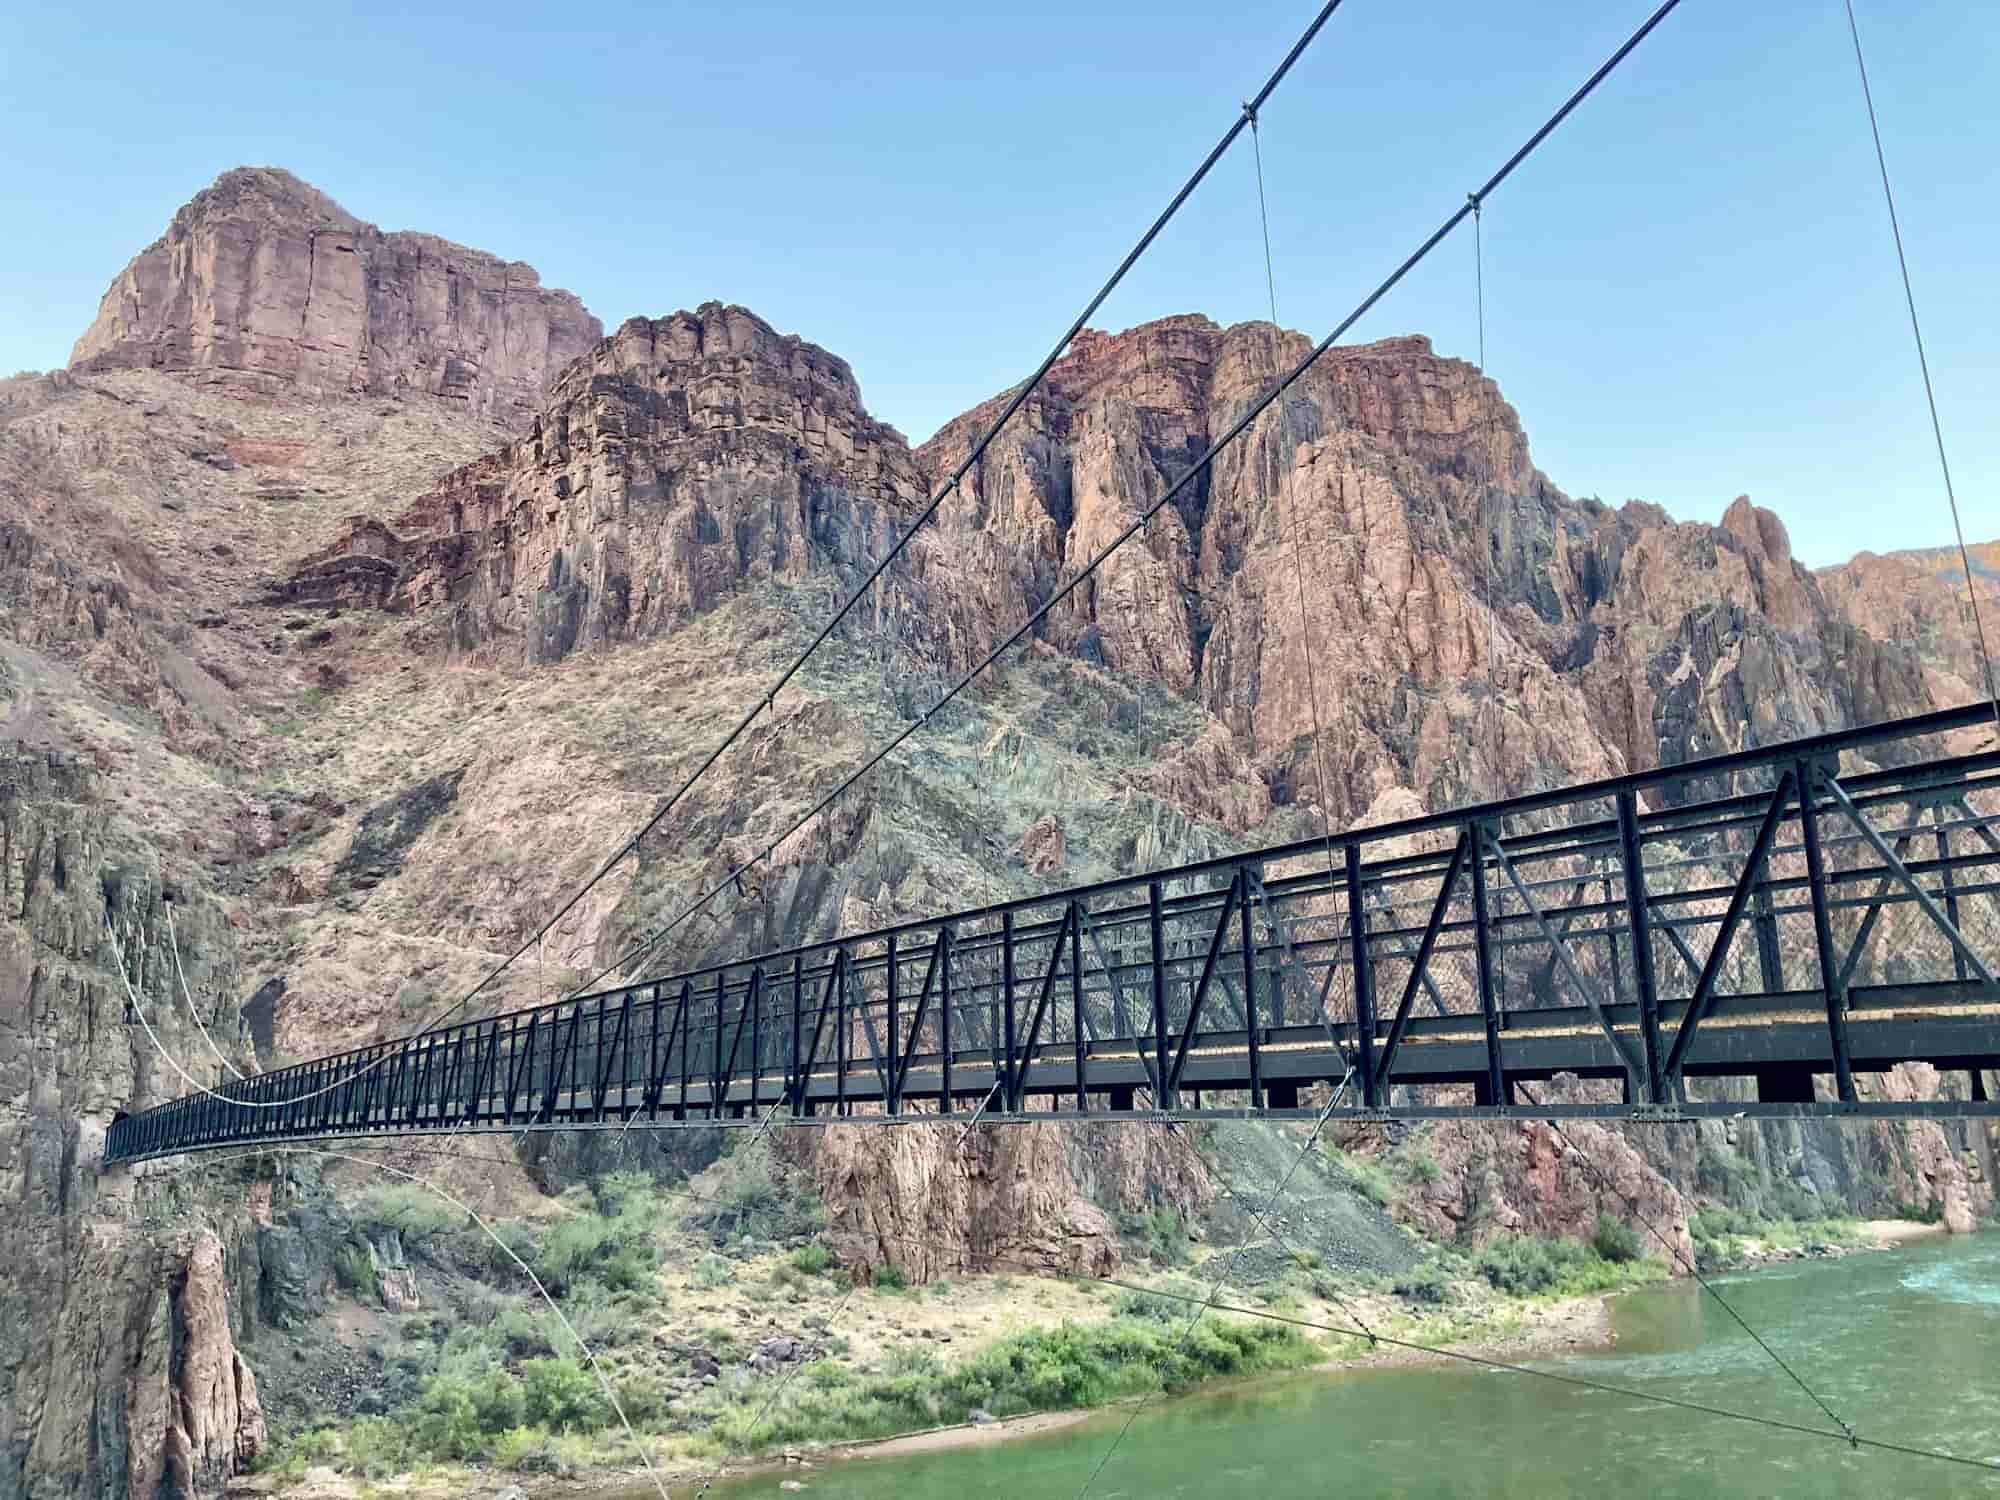
Finally, you’ll reach the river and cross the Colorado on the Kaibab Suspension Bridge. Check out the cool perspective of the river that most visitors never get to see!
Then continue towards Phantom Ranch and the North Kaibab Trail, following the signs.
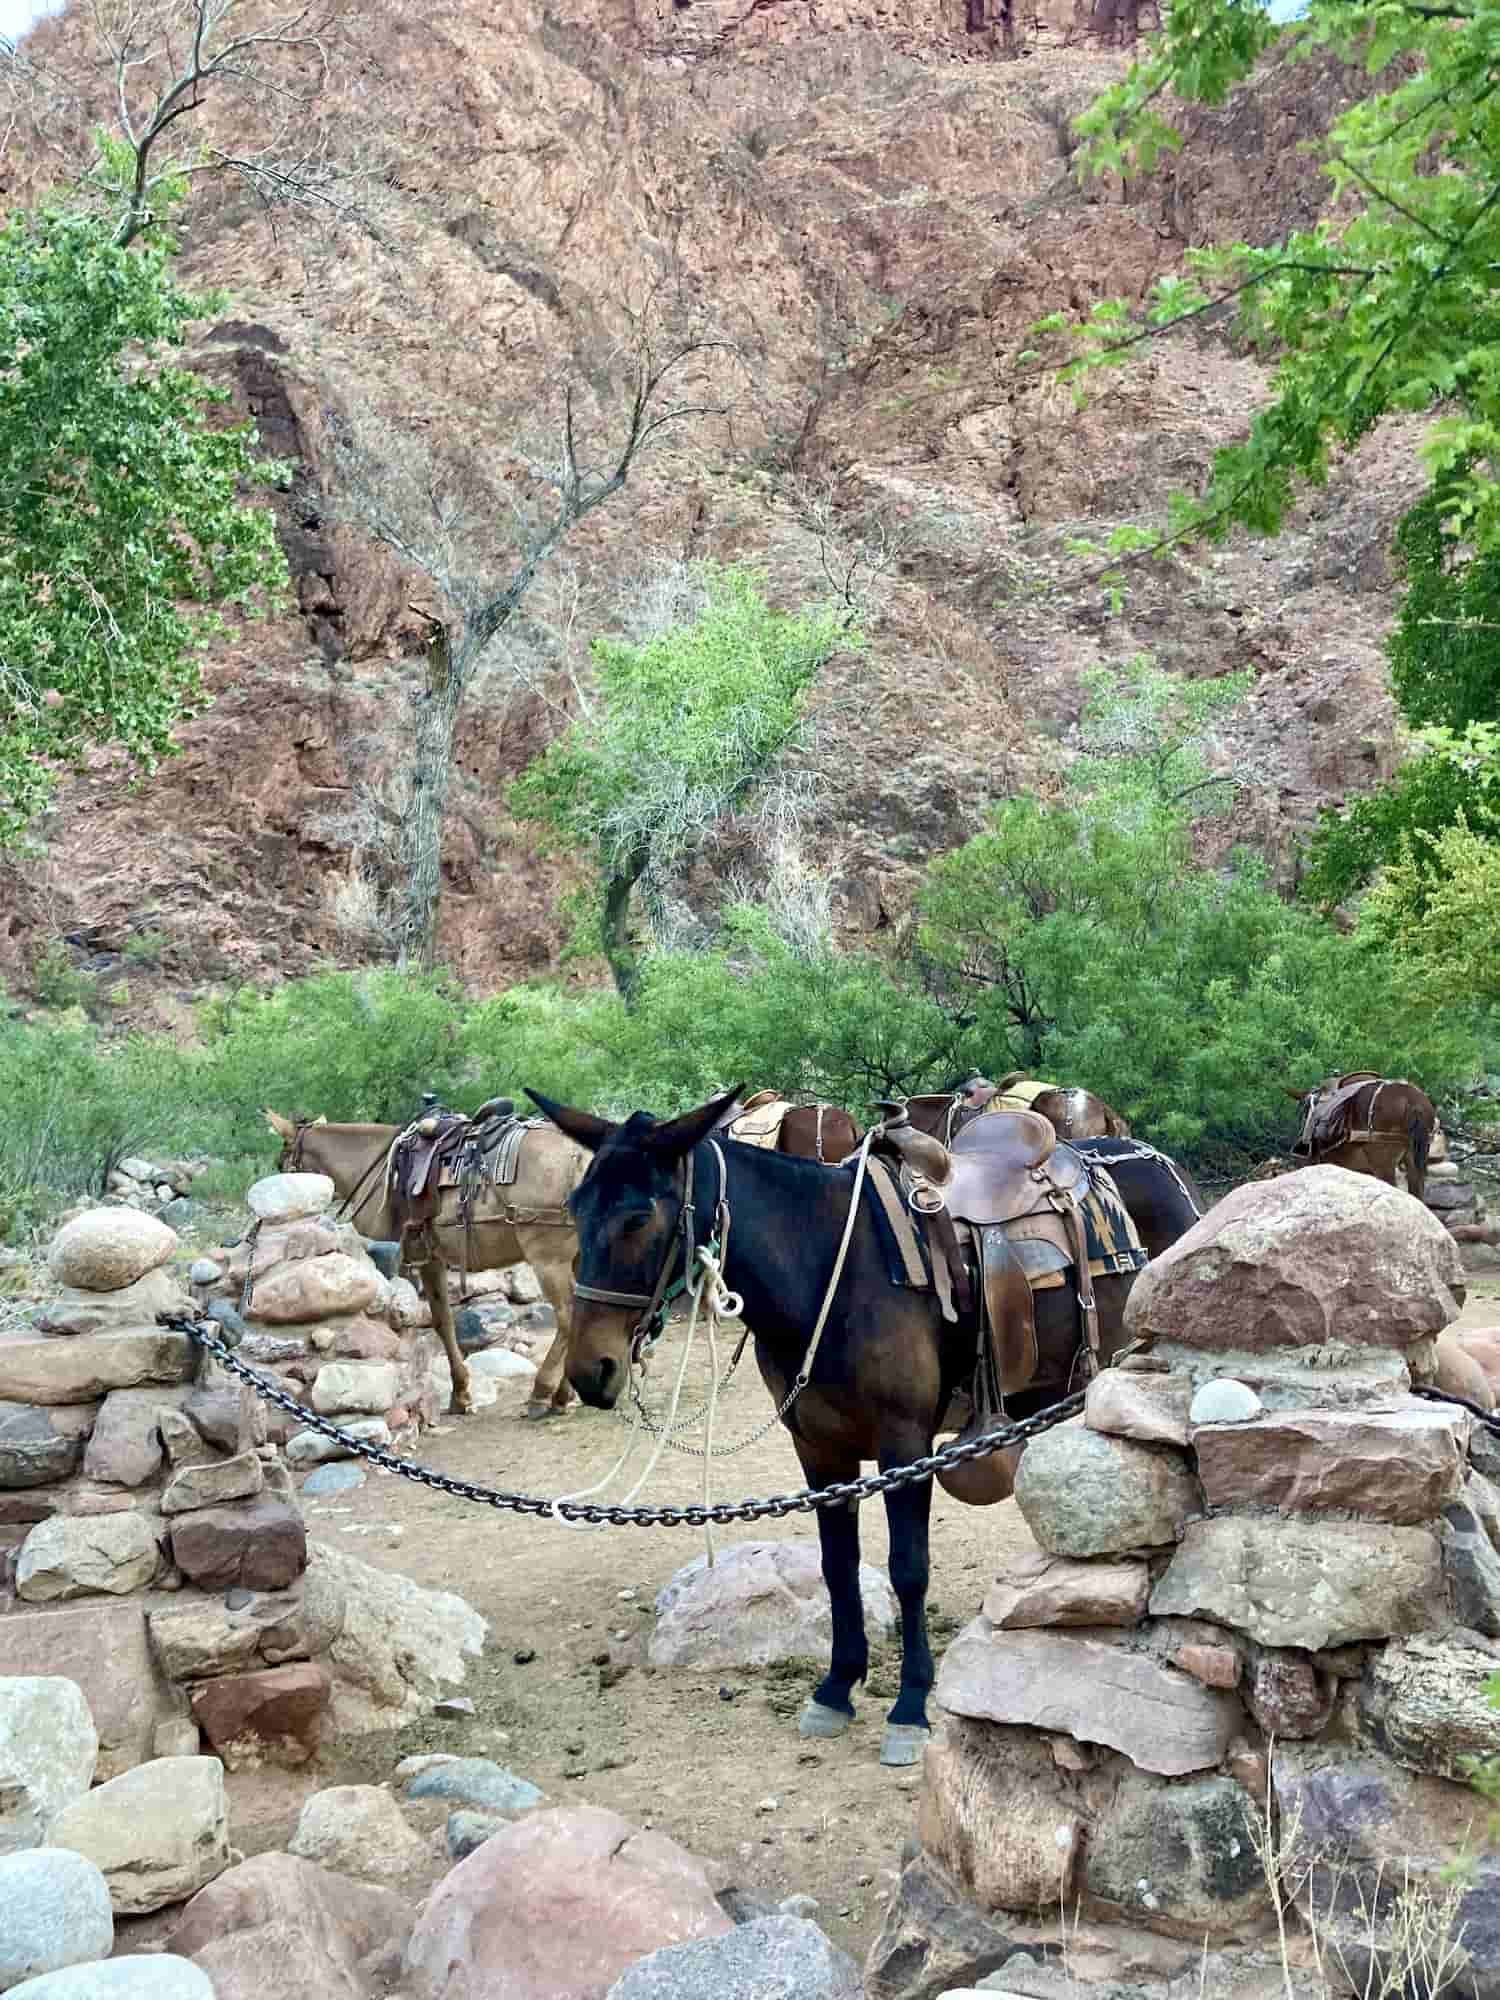
Phantom Ranch is a perfect place to take a break, have a snack, fill up your water, and use the pit toilets. But don’t dawdle too long, because Phantom Ranch is the hottest spot in the canyon, and you need to start making your way out of “The Box” before the heat of the day truly sets in.
As you leave Phantom Ranch, you’ll hike along Bright Angel Creek between the soaring walls of the Grand Canyon. The uphill grade is very gentle here, which seems nice until you realize how much elevation gain you’ll have to take on later on the trail.
Soon you’ll see signs for Ribbon Falls, where you can take a short detour down a side canyon to see the waterfall. Or just continue up North Kaibab to Cottonwood Campground, where you’ll be able to fill up water and use the toilets.
As you leave Cottonwood, you’ll be exiting “The Box” but entering the uphill grind that will continue all the way to the North Rim.
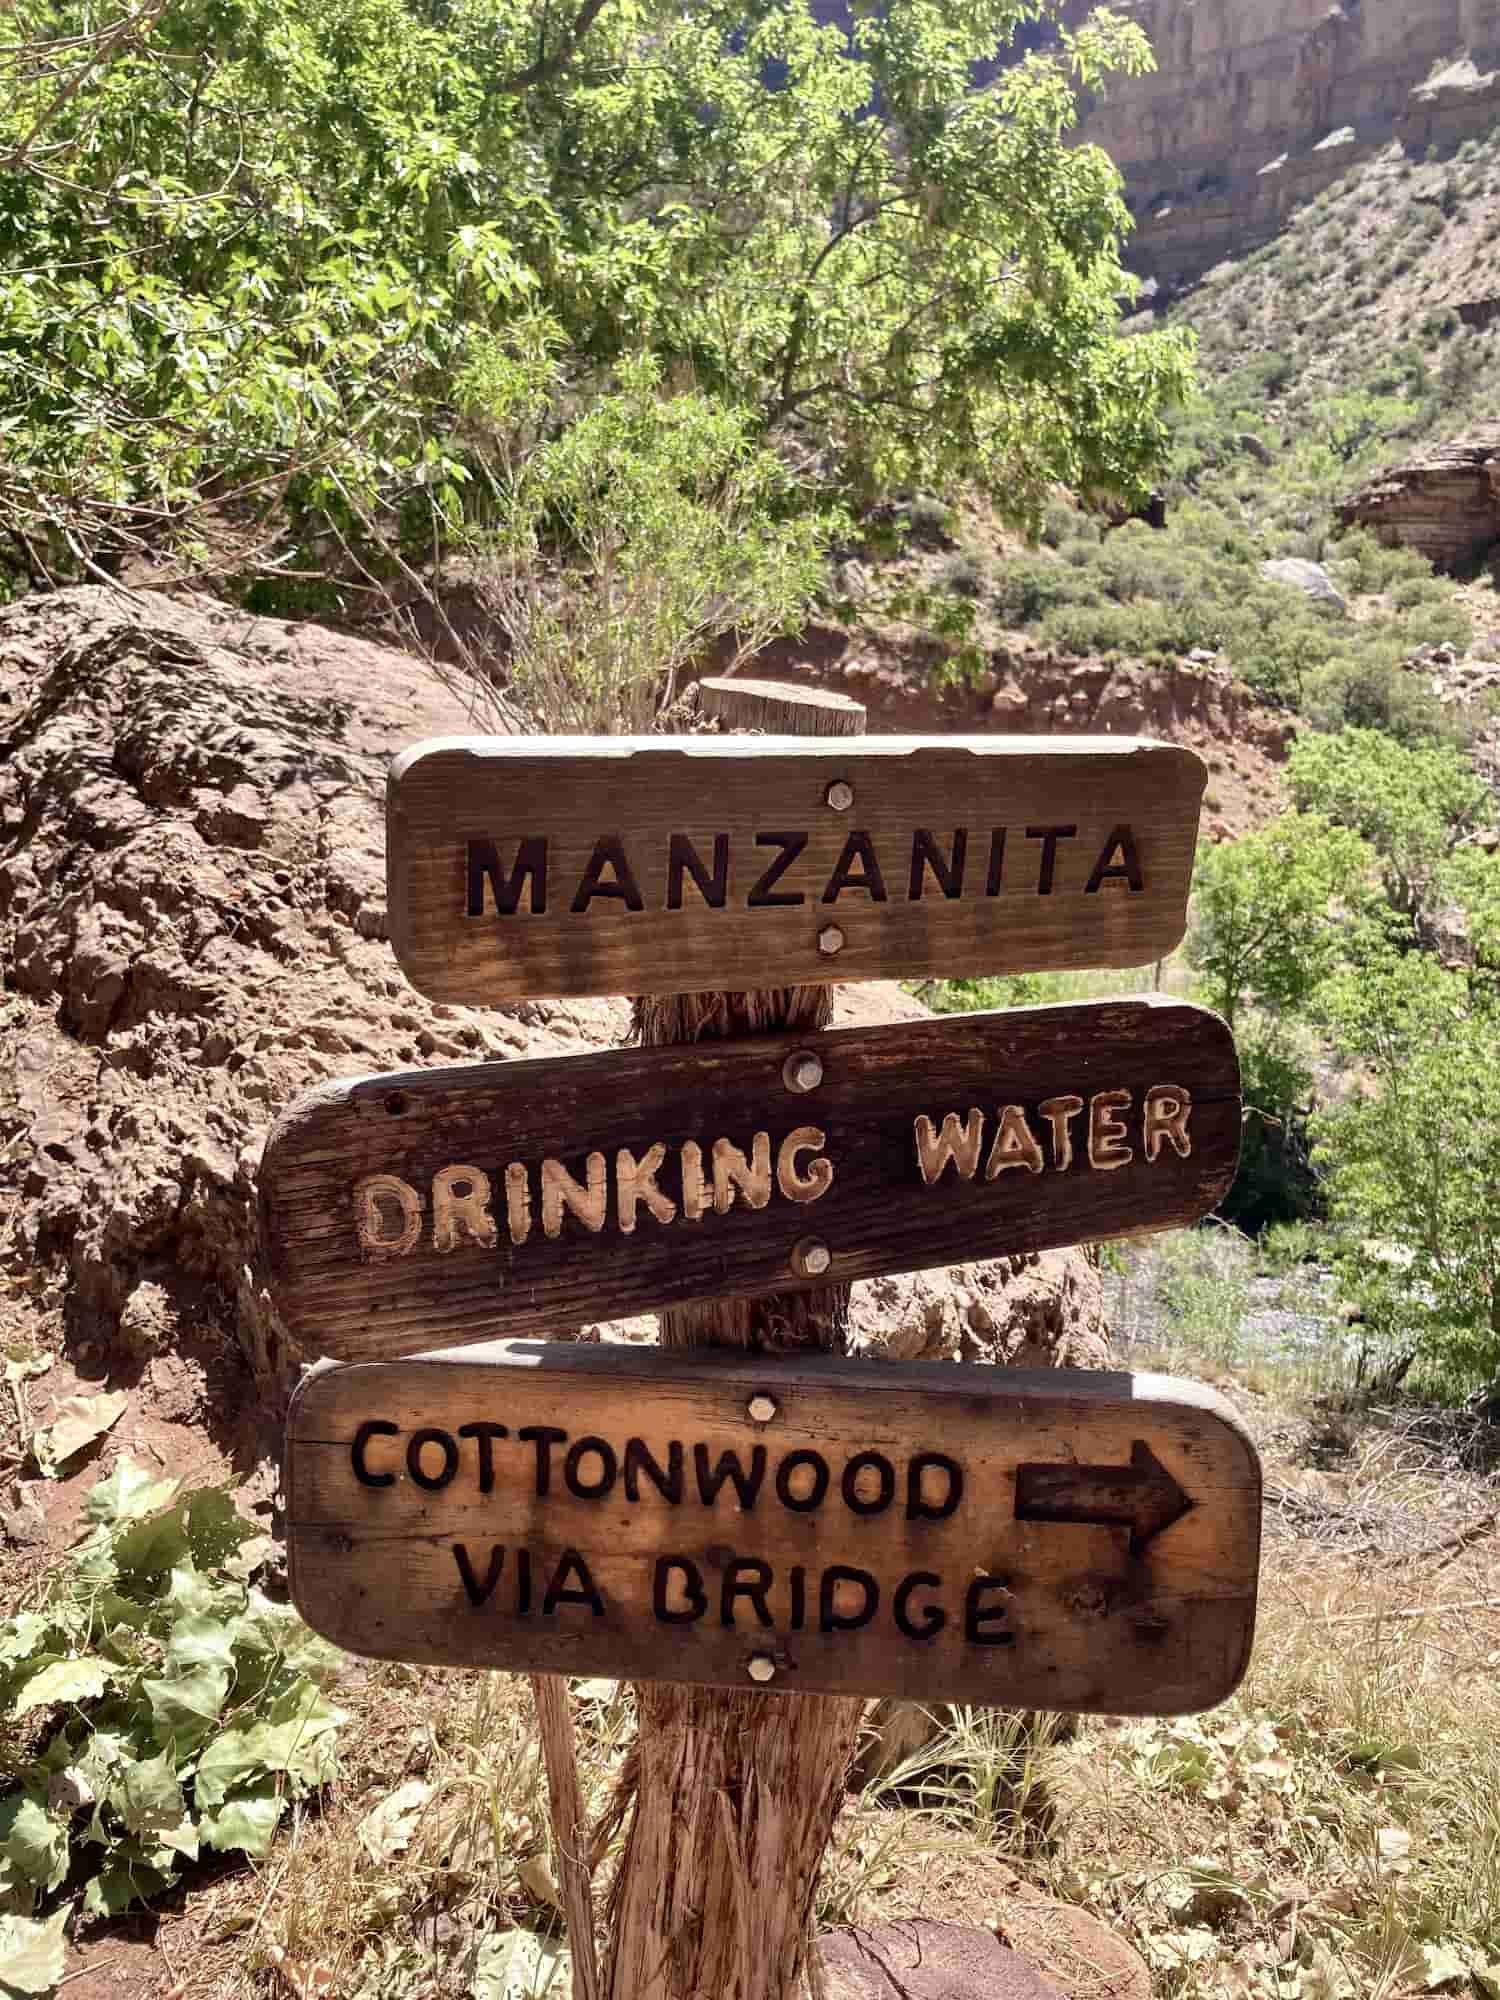
Next you’ll come to Manzanita Rest Area, where you can find some shade, fill up your water, and stop by the pit toilets. We also found it to be a great spot to soak your cooling bandana – and your clothes! Once you’re cooled and rested, step back into the sun on the steep trail.
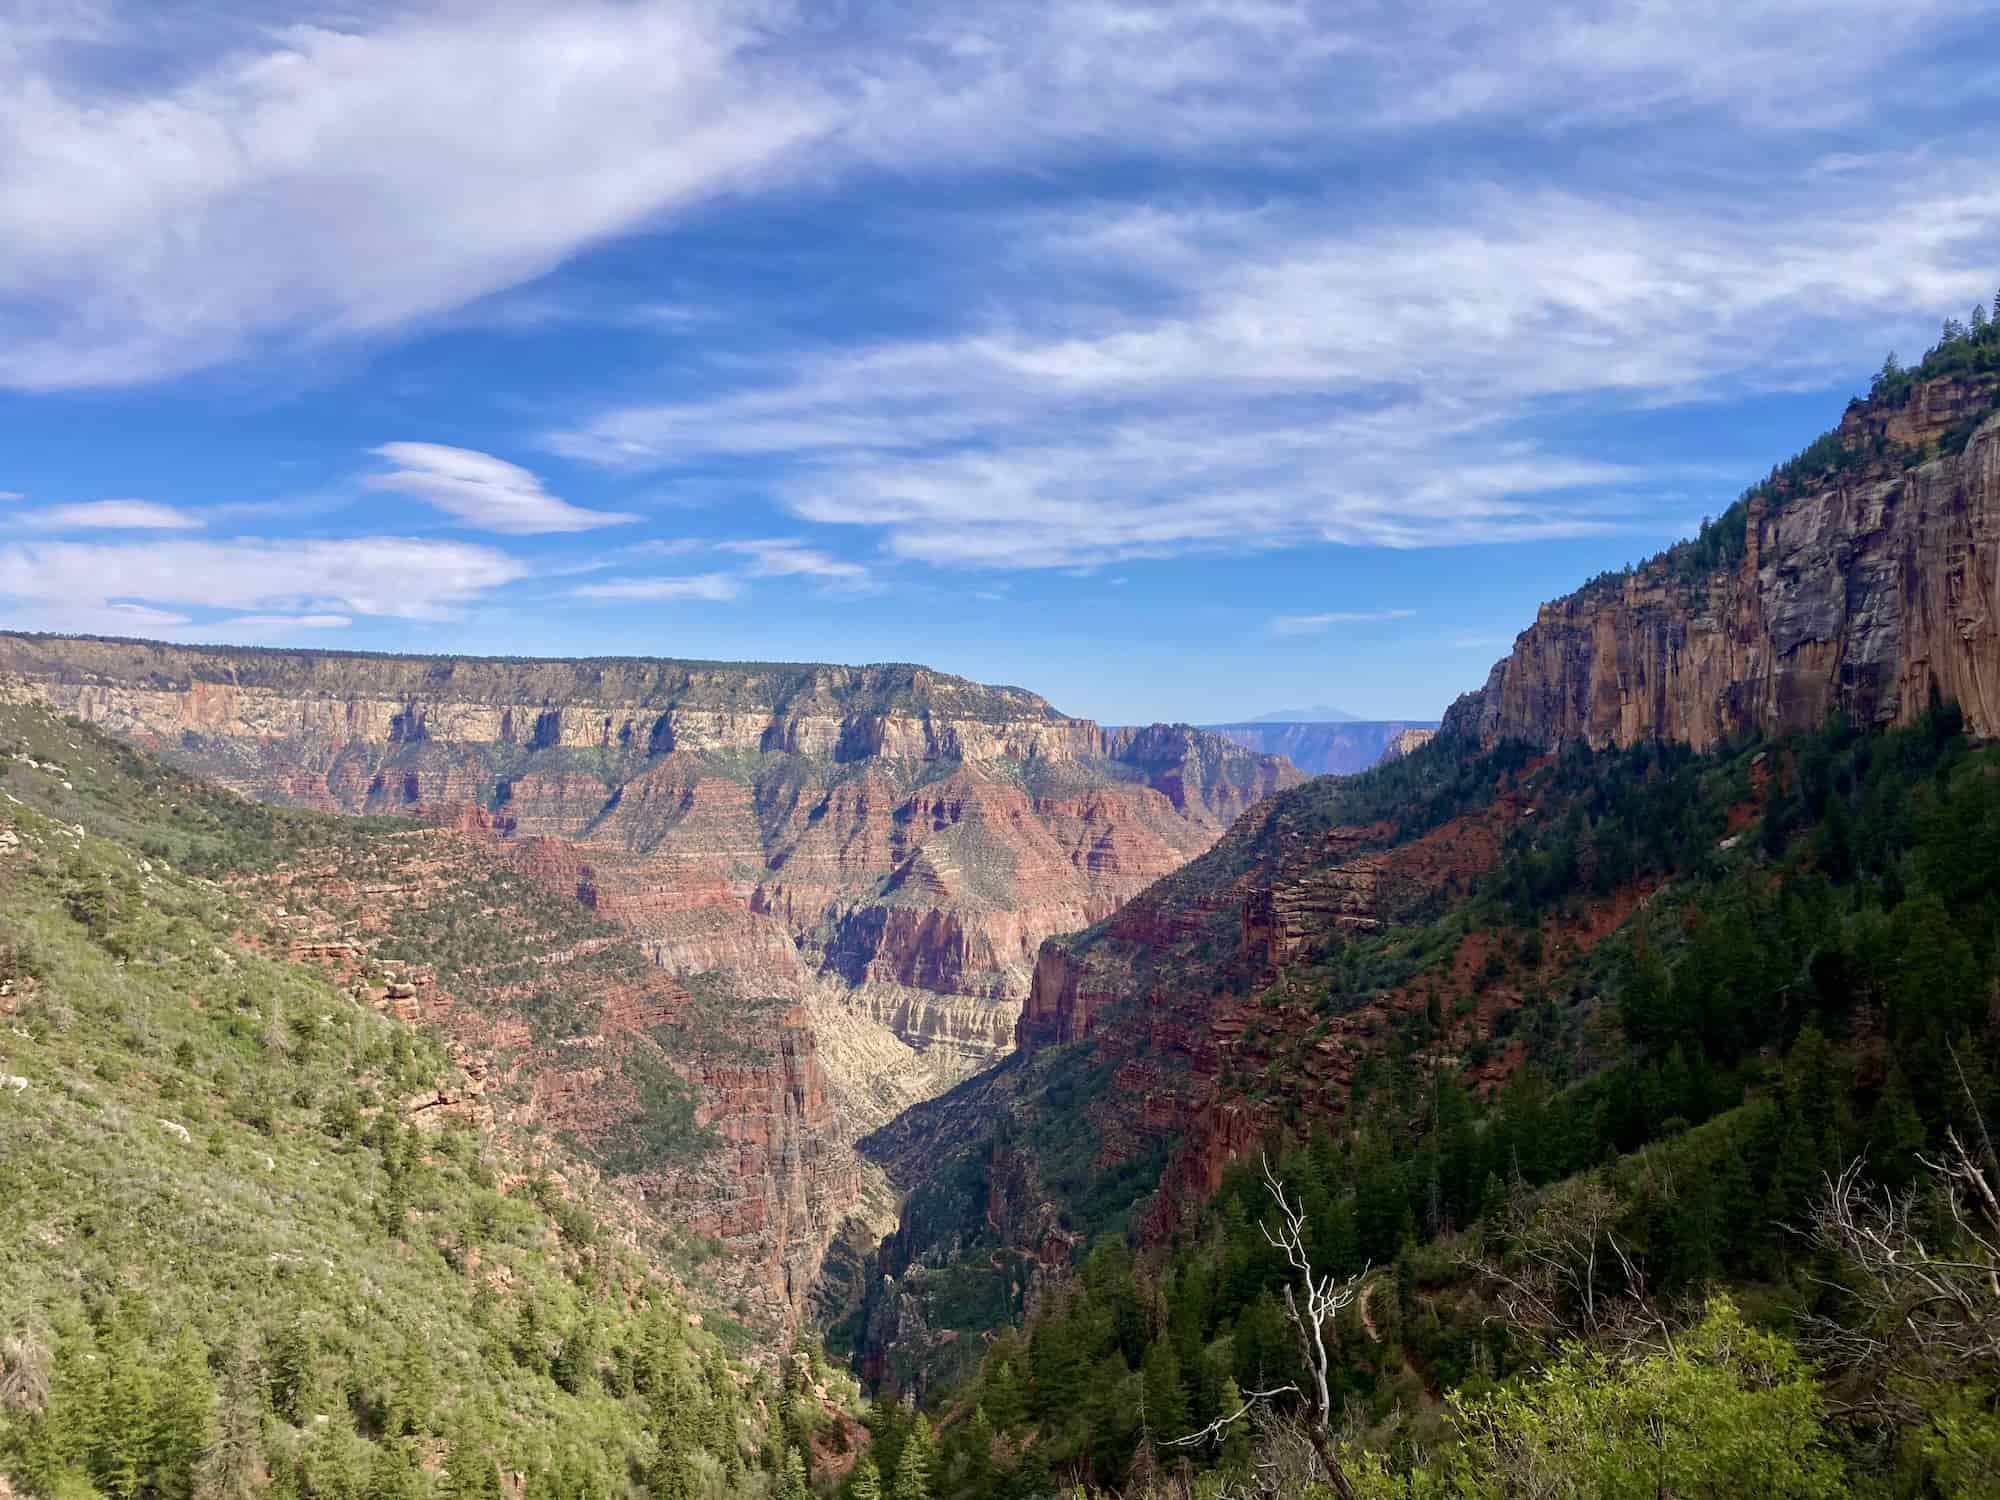
Not going to lie, the next 5 miles to the North Rim are absolutely grueling, with about 3,850 feet of elevation gain when you’ve already been hiking all day in the hot sun. This is where you need to dig deep, mentally and physically, and just keep putting one foot in front of the other.

Redwall Bridge is your next landmark where you can see that you’ve made some progress, even if it’s slow-going. Then you’ll come to the Supai Tunnel, where you’ll start to run into more hikers just taking a short day hike a few miles down from the rim.

From the Supai Tunnel, it’s two miles to the North Rim, and thankfully, it’s mostly shaded, so you finally get a break from the unrelenting sun. Coconino Overlook is a great place to stop for a picture and to take in the views before your final .7 mile push to the North Rim.
When you take that final step out of the trees and onto the North Rim, you can celebrate your amazing accomplishment of hiking the Grand Canyon Rim-to-Rim!

9. IMPORTANT GRAND CANYON RIM-TO-RIM HIKE SAFETY TIPS
When planning your Grand Canyon Rim-to-Rim hike, you should be aware of these hazards and be prepared for what you’ll encounter on the trail.

HEAT
The number one danger in the Grand Canyon is the extreme heat. Heat can lead to dehydration, hyponatremia, heat exhaustion, and heat stroke, all of which can be extremely dangerous when you’re in the canyon and need to get back out.
This is why you should really only attempt to hike the Grand Canyon rim-to-rim as early or as late in the season as possible (mid-May or mid-October). It is simply way too hot to hike this trail in the summer.
It can still get extremely hot in the canyon in May and October though, so you need to be prepared. Bring plenty of water as well as some sort of filter as a backup if the water faucets aren’t on.
And be sure to bring electrolytes to add to your water. You’ll be sweating a lot, and it is important to keep your sodium levels in balance. Salty snacks also help with this.
We also used Gossamer Gear hiking umbrellas on our recent Grand Canyon rim-to-rim hike, and honestly, they are game changers! So many people we passed on the trail were jealous of our portable shade.

CLIFF DROP-OFFS
The trails on the Grand Canyon rim-to-rim hike are well-maintained and wide, so you shouldn’t have trouble staying on them. However, it is still important to pay attention (and be careful when posing for photos), because there are steep drop-offs at times if you get too close to the edge.

RATTLESNAKES
Rattlesnakes love the desert heat, so they do live in the Grand Canyon. However, rattlesnakes prefer to avoid humans, and since the Grand Canyon trails are busy, the snakes tend to stay in hiding. But always watch where you step, especially if you’re stepping off trail for a rest.
10. WHAT TO BRING ON YOUR GRAND CANYON RIM-TO-RIM HIKE

The Grand Canyon Rim-to-Rim hike requires a few things that I don’t bring on every hike, and the list below covers these things that I absolutely recommend.
But this is not a complete list of everything you need to bring on the hike, so be sure to check out my hiking packing list as well.
Note: The list below contains affiliate links.
Again, this is not an exhaustive list of what you need, but just some of the most important things for your Rim-to-Rim hike! Be sure to check out my ultimate hiking gear packing list for all of my day hiking gear recommendations!
GRAB MY DAY HIKING PACKING LIST
So that you can hit the trails with peace of mind knowing that you didn’t leave anything essential behind!
Whew, that was a lot! But the Grand Canyon Rim-to-Rim is a big challenge, and hopefully this post has helped you feel more prepared to take it on. Is this epic hike on your bucket list? Let us know in the comments!
LOOKING FOR MORE DESERT ADVENTURES?
For additional desert hiking adventures, check out our resources below:
ESSENTIAL HIKING & BACKPACKING RESOURCES
Also be sure to check out these essential hiking resources!
Cheers,
Allison - She Dreams of Alpine


The 13 Best Great Basin National Park Hikes | Hiking in Great Basin National Park might fly under the radar compared to other more famous national parks, but that means you can find solitude and escape the crowds while exploring the ruggedly beautiful landscape. Hiking Great Basin National Park provides a variety of options to challenge yourself to summit a peak or simply go for a stroll among ancient trees. This park is a hidden gem, and hiking is one of the best ways to explore it! | shedreamsofalpine.com