The Clouds Rest Hike – Ultimate Trail Guide to One of Yosemite’s Best Hikes
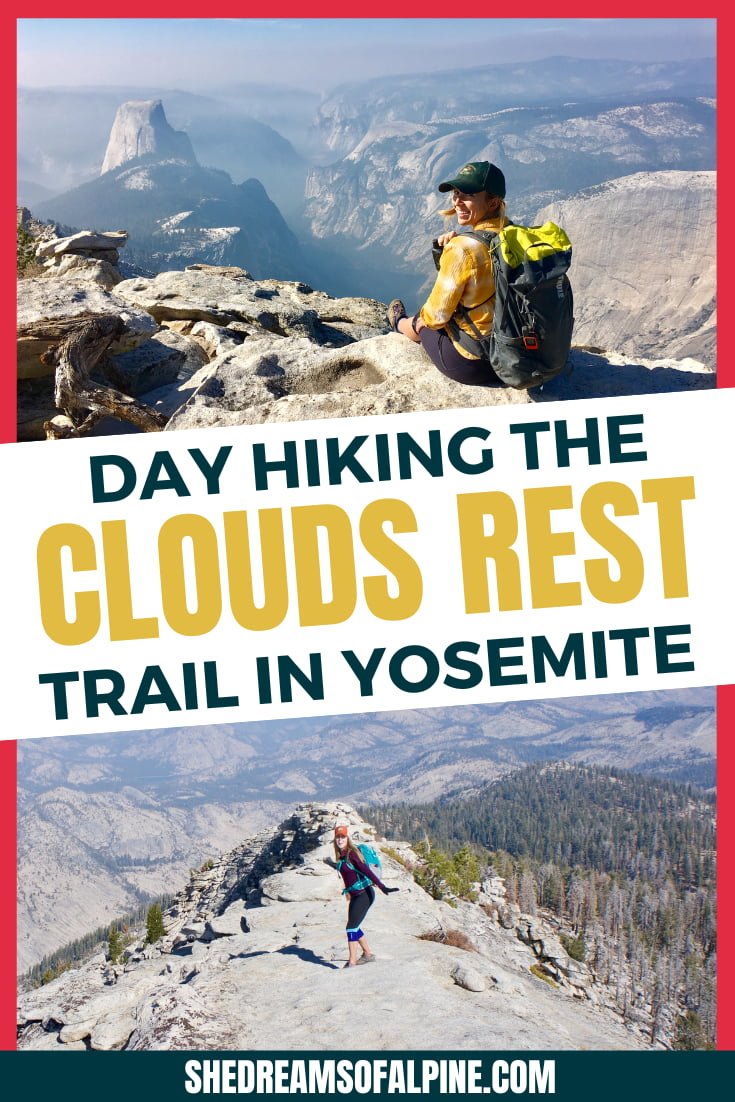
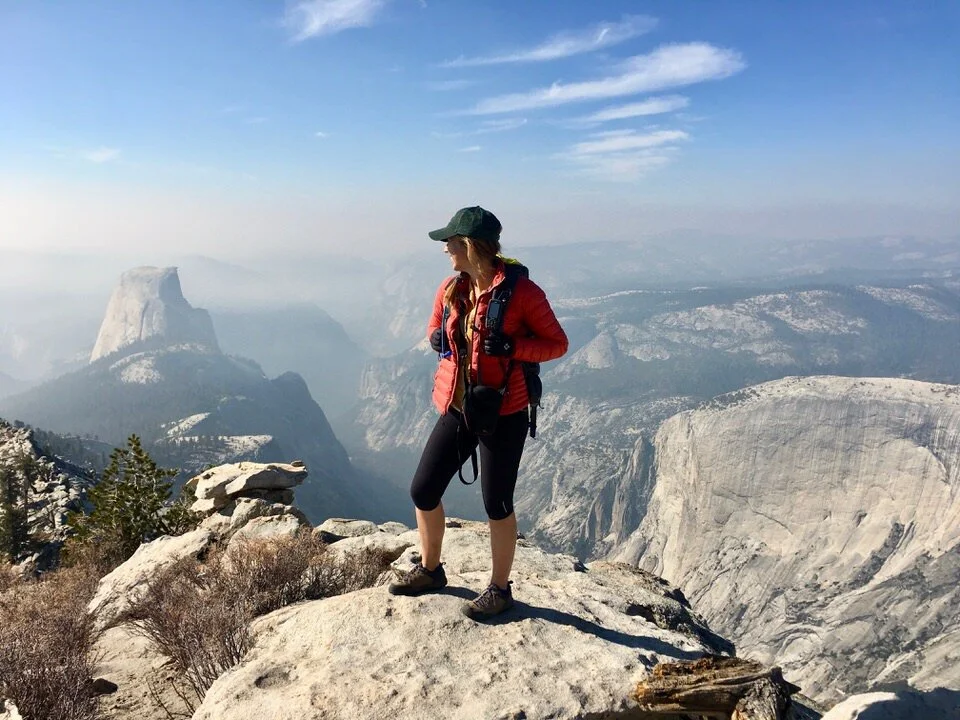
If you’re searching for sweeping views of Yosemite Valley and an epic view of Half Dome, you can’t beat the Clouds Rest hike. It’s absolutely one of the top five best hikes in Yosemite, in my opinion, and should be on every Yosemite National Park visitor’s hiking agenda.
Although the Half Dome hike typically gets all the attention, hiking Clouds Rest actually takes you to a higher summit that offers a panoramic vista which includes an unbeatable view of Half Dome itself.
If you missed out on snagging a Half Dome permit and are looking for a great alternative hike, then the Clouds Rest trail is a great choice.
This hike is an all-day adventure for most people, so read on for more planning and logistic details for this epic Yosemite hiking trail.
WHAT WE WILL COVER IN THIS GUIDE to Clouds Rest
Hiking Clouds Rest is a big undertaking, but most people do it as a day hike. The Clouds Rest hike covers about 12 miles and 3,000 feet of elevation gain, so this isn’t a hike to take lightly. This guide is designed to give you all the info you need to tackle the Clouds Rest hike and enjoy the adventure.

In this post, we will cover the following topics to help you plan and prepare for your very own successful Clouds Rest hike:
Why Hike Clouds Rest - A few of the reasons you should add Clouds Rest to your list of must-do hikes in Yosemite.
Clouds Rest Trail Stats - All the nitty gritty details for the trail in one spot. How many miles, elevation gain, & more.
When to Hike Clouds Rest – Details about the best time to hike Clouds Rest and typical Clouds Rest weather to expect on your trip..
Clouds Rest Trail Map & GPX Files - I've created a map detailing the entire trail that you can explore, including a look at the elevation gain/profile of the hike. You can also download this file as a GPX file to upload into your own personal GPS device.
How to Get to the Clouds Rest Trailhead – Driving and parking recommendations.
Where to Stay: Camping Near Clouds Rest – Where to camp close to the Clouds Rest trail.
Itinerary for Hiking Clouds Rest - I’ll walk you through my experience and suggested itinerary for hiking Clouds Rest.
Important Clouds Rest Safety Tips – Tips about the top hazards to expect along the Clouds Rest trail.
What to Bring on Your Clouds Rest Day Hike – The essential packing list for the Clouds Rest hike. Don’t hit the trail without these things!
If you’re looking for specific information, feel free to skip ahead to the section you’re looking for!
Plus, be sure to check out the bottom of this post to find more hiking trail guides in California and other additional hiking, camping, and backpacking resources!
GRAB MY [FREE] OUTDOOR BACKPACKER STARTER KIT
I created the Ultimate Outdoor Backpacker Starter Kit for you (and it's FREE)! This starter kit is filled with 14 pages of my best hiking and backpacking tips to help you learn what it takes to become a safe, confident, and self-sufficient outdoor backpacker!
1. WHY HIKE CLOUDS REST
The Clouds Rest trail is a fantastic hike that makes an especially great alternative if you had your sights set on Half Dome Trail but couldn’t snag permits.
Just like Half Dome, Clouds Rest is a long trail that leads to some seriously stunning views. In fact, in my opinion, it’s probably the second-best hike in Yosemite! But since permits are NOT required to hike Clouds Rest, you don’t need to plan far in advance (and rely on the luck of the lottery) to do this hike.
Just like the Half Dome hike, you also get a bit of thrill and challenge thrown into the mix. The hike is long (12 miles) and has a decent amount of elevation gain (~3000 feet). Plus, near the top there’s a tiny bit of exposure to reach the end of the hike – but don’t worry, it’s not too bad!
Adding the Clouds Rest trail to your agenda when visiting Yosemite also makes a great adventurous addition to any road trip through California.
2. CLOUDS REST TRAIL STATS
If you’re anything like me, the first thing you want to know about a trail is all the important stats and information so you can get a good overview of what to expect on the hike. So here you go, my friend!
CLOUDS REST TRAIL QUICK FACTS
Clouds Rest Elevation: 9,926 feet
Trail to Summit: The Clouds Rest Trail via Tenaya Lake is the most direct route.
Type of Trail: Out & Back
How long is the hike to Clouds Rest: ~12 miles (Check out Section 4 ‘Clouds Rest Hike Map, Itinerary, & GPX File’ for more details.)
Total Elevation Gain: 3,113 feet
Clouds Rest Trailhead: Start at the Sunrise Trailhead, located on Tioga Road near Tenaya Lake. (There are other ways to get to Clouds Rest, but this is the most common route and the route we are talking about here in this post)
Trailhead Elevation: 8,150 feet
How long does it take to hike Clouds Rest? It takes approximately 8 hours to hike Clouds Rest from Tenaya Lake (several more if you start from the Valley floor). Of course, this depends heavily on your fitness level, but you should plan for this hike to take most of the day.
Clouds Rest Crowds: Since this is Yosemite, there definitely will be crowds even though Clouds Rest is not as popular as Half Dome. Plan ahead and get to the trailhead early so it’s easier to find parking.
Do you need a Clouds Rest permit to hike the Clouds Rest Trail? Nope! For that reason, Clouds Rest makes an awesome alternative hike if you aren’t able to snag a Half Dome permit.

How difficult is hiking Clouds Rest? While it is not considered technical terrain, Clouds Rest is a strenuous all-day hike.
How dangerous is hiking Clouds Rest? With proper preparation, you should be able to safely summit Clouds Rest. The ridgeline near the top is a bit exposed, so you should be prepared for that, especially if you’re afraid of heights. However, it’s non-committing (meaning, you can always safely choose to turn around and not do this section if you decide it’s too scary). It’s definitely not as exposed as the Angel’s Landing Hike in Zion National Park.
Is there drinking water available along the Clouds Rest hike? Not really. You should plan to carry all the water you’ll need (and that will be a lot in the summer!). I recommend carrying at minimum 3-4 liters per person.
Is hiking Clouds Rest dog-friendly? No, dogs are not allowed on the Clouds Rest trail. Dogs are not allowed on most trails in Yosemite National Park.
Is hiking Clouds Rest kid-friendly? Not really. This is a very difficult hike and the ridge at the top requires careful steps and could be dangerous for children. While it’s definitely not a good hike for young children, older kids who are experienced hikers in good shape would probably be okay.

3. WHEN TO HIKE CLOUDS REST & CLOUDS REST WEATHER AVERAGES
The trailhead for Clouds Rest is off Tioga Pass Road, which closes completely in the winter. So the best time to hike Clouds Rest is when the road is open, which is usually June through October, depending on the snowfall during the season. You really don’t want to attempt to hike Clouds Rest when there is snow on the trail.
For the best temps and conditions, I would highly recommend hiking Clouds Rest in September. This will give you a trail free of snow without the much hotter temperatures you can encounter during the summer. (Just know that wildfires can be a concern that time of year, so keep that in mind.)
Check out the Clouds Rest weather average temperature map below for reference.

Be prepared before you go. Just like I teach my students in my backpacking program. It’s important that you research your weather conditions before you go, weeks and days before your trip. You can check the weather conditions at one of the following resources:
Yosemite Weather Forecast Map – A clickable map from the NPS that takes you the National Weather Service forecast for specific areas of the park
Mountain Forecast – One of my favorite sources for mountain weather forecasts when checking a few days before a trip
Important Notes: At the beginning of the hike, you have to cross the Tenaya Lake outlet, and this can be much more difficult if there is a lot of snowmelt making the water levels higher. This is another good reason to hike Clouds Rest later in the season.
4. CLOUDS REST TRAIL MAP & GPX FILES
The Clouds Rest trail is fairly straightforward and easy to follow, but it’s still a good idea to have a general idea of where you’re going before you head out. The trail does have two forks after Tenaya Lake. and you’ll want to turn right at both of them to stay on track for Clouds Rest.
I’ve created a map below detailing the whole Clouds Rest trail that you can use to get an overview of the trail, including a look at the Clouds Rest elevation gain/profile of the hike. You can also download this file as a GPX file to upload into your own personal GPS device.
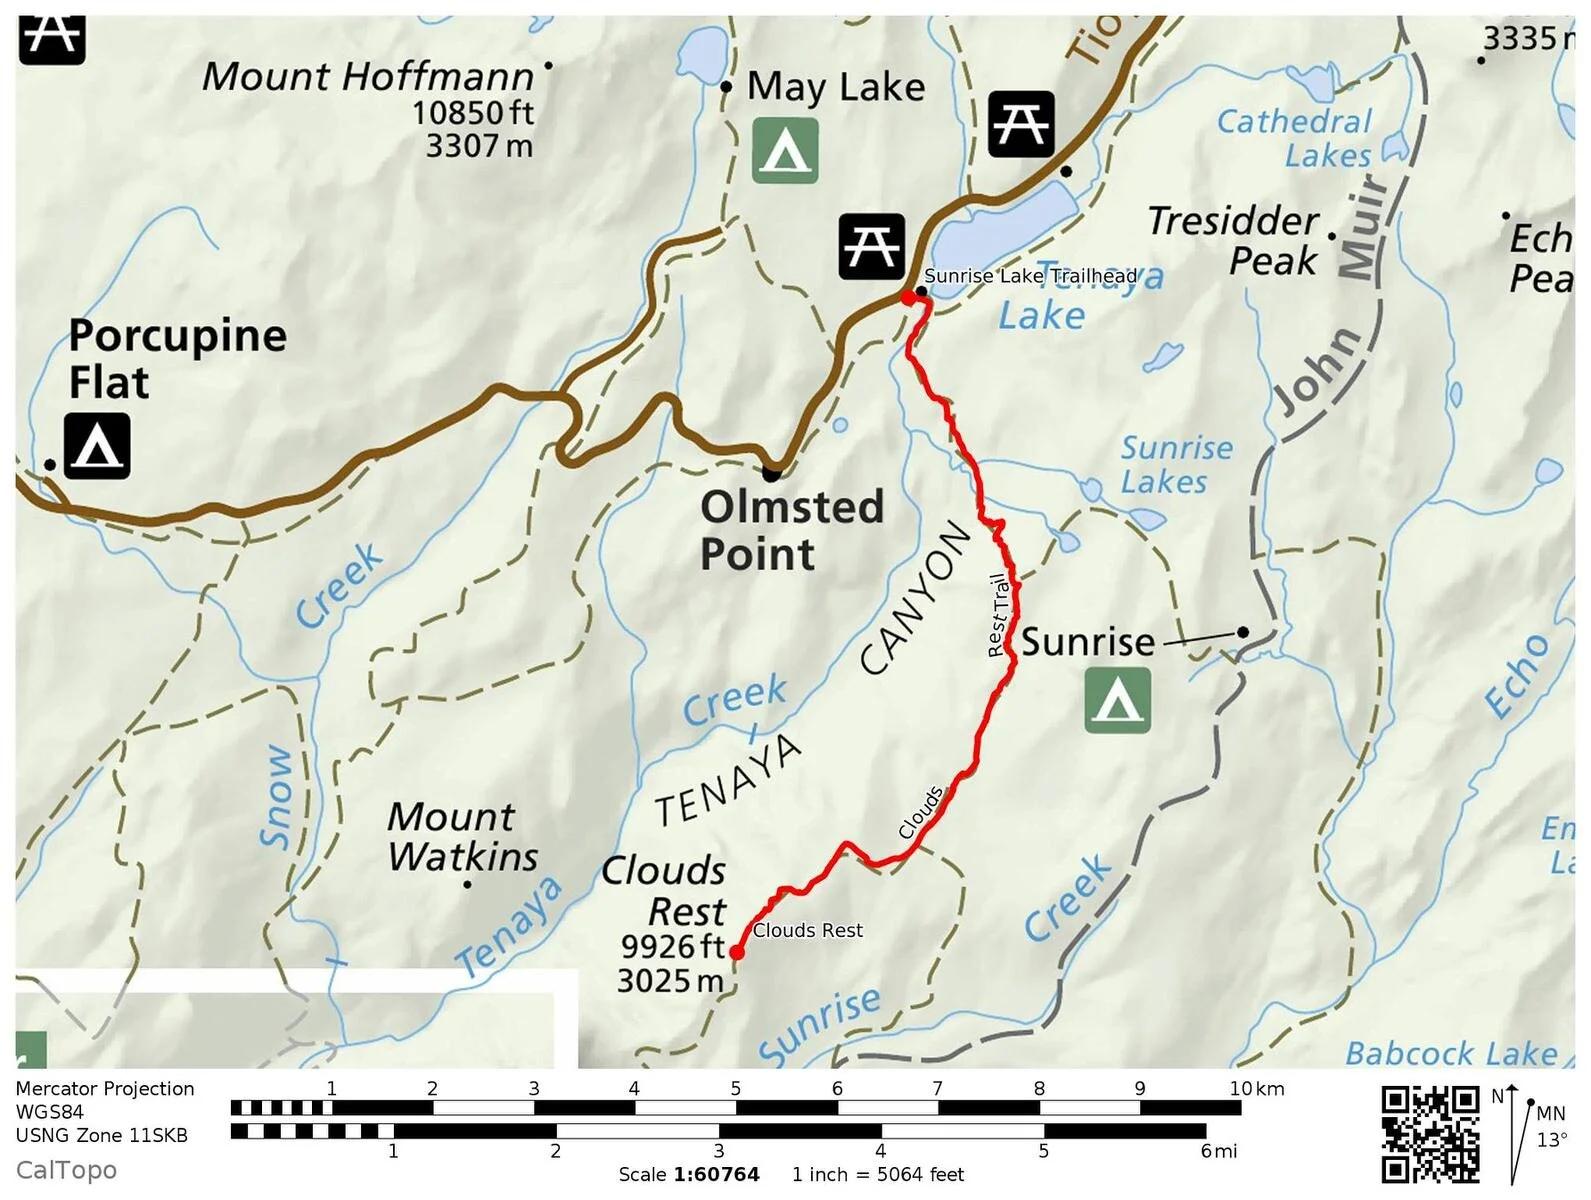
I always recommend downloading a GPX file onto a GPS device, that way you can check in from time to time to be sure you’re on the right trail.
You can download the GPX files from Clouds Rest Trail map below. It details all the key milestones of the hike including the trailhead start, Clouds Rest summit, and more.
DOWNLOAD THE CLOUDS REST GPX FILES FOR YOUR GPS HERE:
Knowledge is power my friend, and I'm a girl who loves data. Get access to this trails GPX file PLUS my library of GPX files with tracks and waypoints for all the trails loaded onto the She Dreams of Alpine blog.
Load this puppy into your trusted GPS and rest easy knowing you have tracks to follow on your next hike or backpacking trip.
DON’T HAVE A GPS? YOU SHOULD.
I believe every hiker and backpacker should strive to be self-sufficient, and that includes knowing how to practice smart navigational skills in the outdoors.
This is an important safety skill set that I teach in-depth inside of my backpacking program. There’s no reason to risk getting lost in the outdoors.
Here’s what I recommend to get started:
(Note: This list contains affiliate links)
Gaia is offering a special 10% discount on a premium account to those who subscribe online through my link.
Don’t know where to start? If you need help with some Gaia GPS basics, download my quick Gaia GPS navigation 101 guide.
2) Get an SOS Device: Once you are able to, I recommend investing in some sort of SOS communication device like the Garmin inReach Mini or the Garmin inReach Explorer+ . These devices provide not only GPS tracking capabilities, but also an SOS satellite search and rescue communicator and text communication abilities in the backcountry.
My Go-To Trail Setup: The Gaia GPS app (premium subscription) + the Garmin inReach Mini.
Alternative to Garmin: Pair your Gaia GPS App with the Zoleo SOS device . With this set up, the Gaia GPS App serves as your GPS navigation device, and the Zoleo serves as an SOS/communication device.
Learn more about the best GPS devices for hiking here.
CLOUDS REST ELEVATION PROFILE
Here’s a look at the Clouds Rest elevation gain profile starting from the Sunrise Lakes trailhead to the Clouds Rest summit and then back down. You’ll see that the switchbacks are definitely tough!

>> JUMP TO SECTION 7 FOR A SUGGESTED CLOUDS REST TRAIL HIKING ITINERARY.
5. HOW TO GET TO THE CLOUDS REST TRAILHEAD
I’m going to keep this section simple. To access the Clouds Rest Trail, you’re going to first need to travel to Yosemite National Park. If you’re coming in from the west side of California, you can drive to Yosemite from a number of California airports, including San Francisco.
If you’re entering from the east side of the Sierra Nevada Mountains, then you’ll take Tioga Pass into the Tuolumne Meadows side of the park. There is an airport in Mammoth Lakes you could fly into, or you could even fly into the Reno/Tahoe area and make the drive down to Yosemite National Park.
If you do this, I definitely recommend staying in Mammoth Lakes. There are some really awesome things to do in Mammoth Lakes in the summer.

The main trailhead for Clouds Rest is located about 16 miles from the east entrance of the park, or about 26 miles from Tioga Pass (the west entrance of Yosemite National Park). From the heart of Yosemite Valley, it’s about 46 miles to the trailhead.
Note: Reservations are required to enter the park during certain times in Yosemite’s busy season, from mid-April to late October. Find out more about when you need a reservation on the Yosemite NPS site here.
GETTING TO THE CLOUDS REST TRAILHEAD
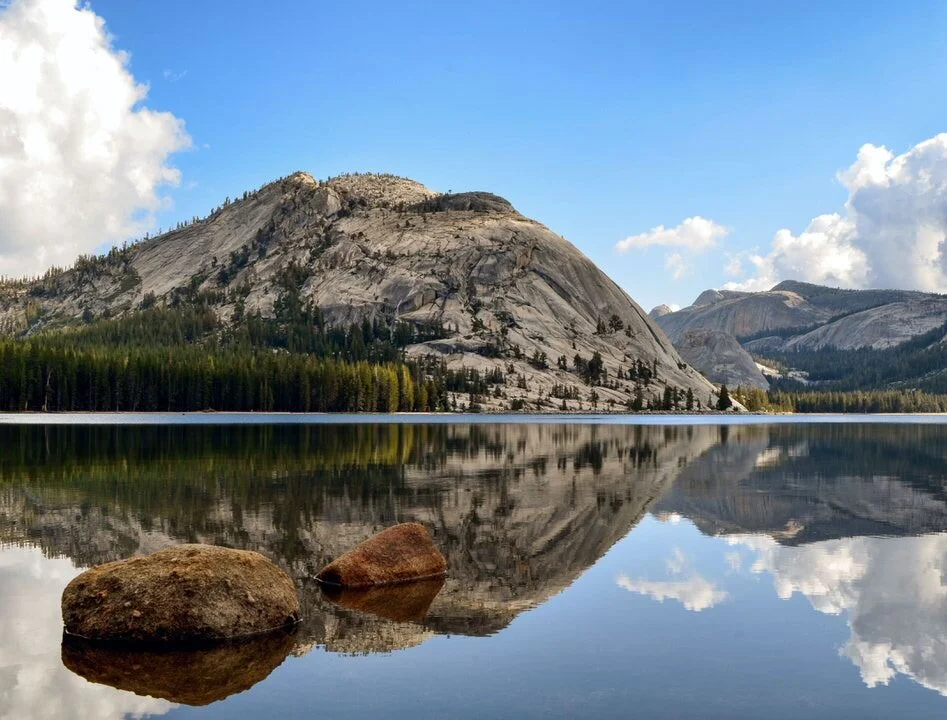
The best place to start the Clouds Rest hike is from Sunrise Lakes Trailhead. While you can begin the Clouds Rest hike in Yosemite Valley, this makes the already difficult hike even longer. To get to the trailhead, take Tioga Road to the west end of Tenaya Lake.
Parking: There is a small parking lot on the south side of the road at Sunrise Lakes, but it only fits about a dozen cars, so it is nearly always full. However, you will usually be able to find a spot close by along the shoulder of the road. Just be aware that there is a no-parking area just across the street from the parking area, so pay attention to signs.
6. WHERE TO STAY: CAMPING NEAR CLOUDS REST
Clouds Rest is usually done as a day hike, so you don’t need to worry about camping on the trail (in fact, camping is not even allowed on most of the trail). But it’s probably a good idea to camp in Yosemite the night before, so you can get an early start. You might want to camp the night after your hike, too.
CLOUDS REST CAMPING - NEAR THE TRAILHEAD
There are several options for camping near Tenaya Lake and the Sunrise Lakes Trailhead. Depending on your overall plans for your visit to Yosemite, you can choose between camping very close to the trailhead or farther away but close to Yosemite Valley.

Tuolumne Meadows Campground: A large campground with 304 sites, this is just a 15-min drive from the trailhead for Clouds Rest. Tuolumne Meadows is typically open from July through October 15, and half the sites are available by reservation while half are first-come/first served.
Note: Tuolumne Meadows Campground is reopening in 2025 after being closed for several years for rehabilitation.
Porcupine Flat Campground: This smaller campground is located about a 10-min drive from the trailhead. With only 52 sites, it is a little more off the beaten path and less crowded than other Yosemite campgrounds. All sites are first-come/first-served, and it is usually open July through October 15.
Crane Flat Campground: This 166-site campground is between Tenaya Lake and Yosemite Valley. While that means is a 50-min drive to Sunrise Lakes Trailhead, it is only a 30-min drive from the Valley if you plan to do more exploring there. The campground is reservation-only and is generally open July through October 15.
Of course, these aren’t the only campgrounds in Yosemite National Park, but just a few of the options that are closest to the Clouds Rest Trailhead.
Please keep in mind that campground availability and rules may change, so check the Yosemite NPS website for the latest information.
7. ITINERARY FOR HIKING THE CLOUDS REST TRAIL
Here I’ll walk you through a suggested itinerary for day hiking the Clouds Rest trail, so you can make your own plan to tackle this trail.

A TYPICAL CLOUDS REST DAY HIKE ITINERARY
You should plan for your Clouds Rest day hike to take at least 8 hours, and you want to get an early start to avoid both thunderstorms and crowds (and to snag a parking spot close to the trailhead).
Here is a typical itinerary for hiking Clouds Rest:
Wake up early and drive from your campsite to park near the Sunrise Lakes Trailhead near Tenaya Lake. The earlier the better!

Head out on the trail into the forest, where you will soon encounter a river crossing. Depending on the season, the water level could be fairly high, so you’ll want to check the conditions ahead of time (and possibly bring an extra pair of lightweight shoes that you don’t mind getting wet).
After a section of flat trail, you will begin a very steep uphill with about 1,000 feet of elevation gain over the course of a mile.
You’ll reach a fork about 2.5 miles in where you’ll head right to continue on the Clouds Rest trail. (The left fork will put you on the Sunrise Lakes trail, which will connect you to the John Muir Trail.) After another few miles of rolling hills through lots of trees and past a lovely lake, you’ll hit a second fork in the trail, where you’ll once again go right.
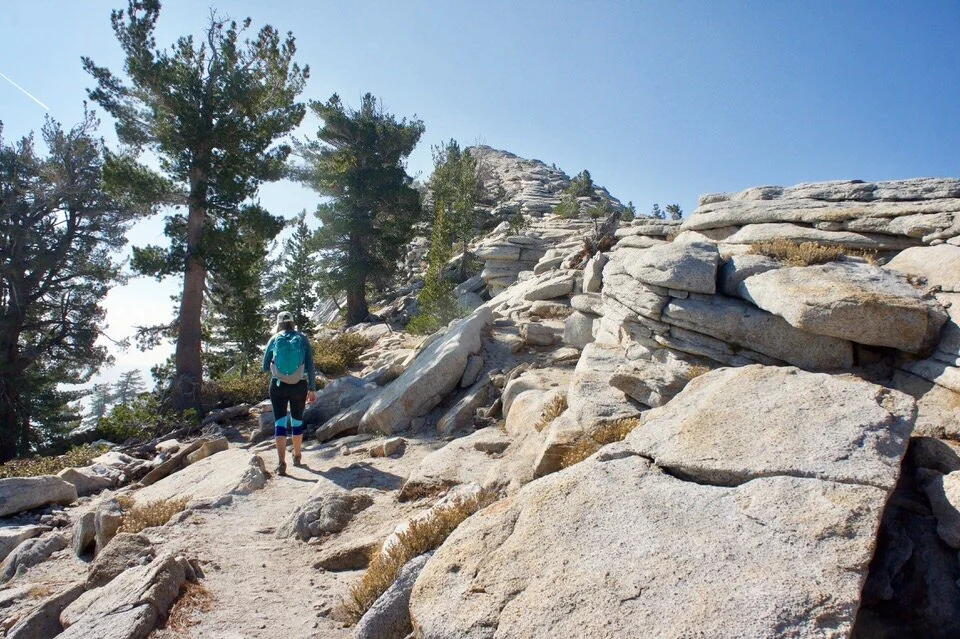
At this point, you’re about 2 miles from the Clouds Rest summit. After another steep uphill, you’ll get a little break on a flat stretch, then face one more steep climb up to the base of the granite formation that you’ll scramble up.

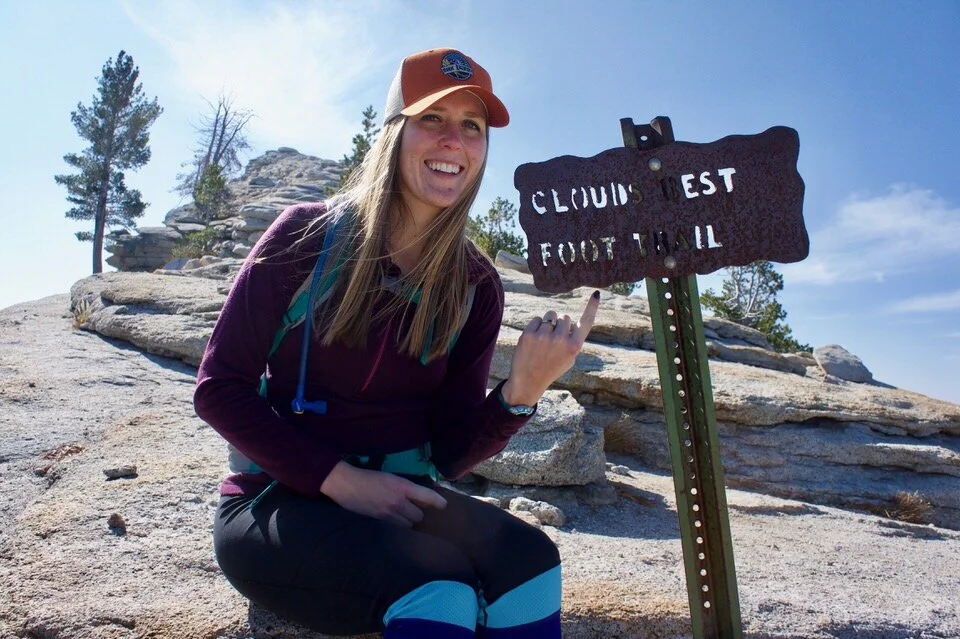
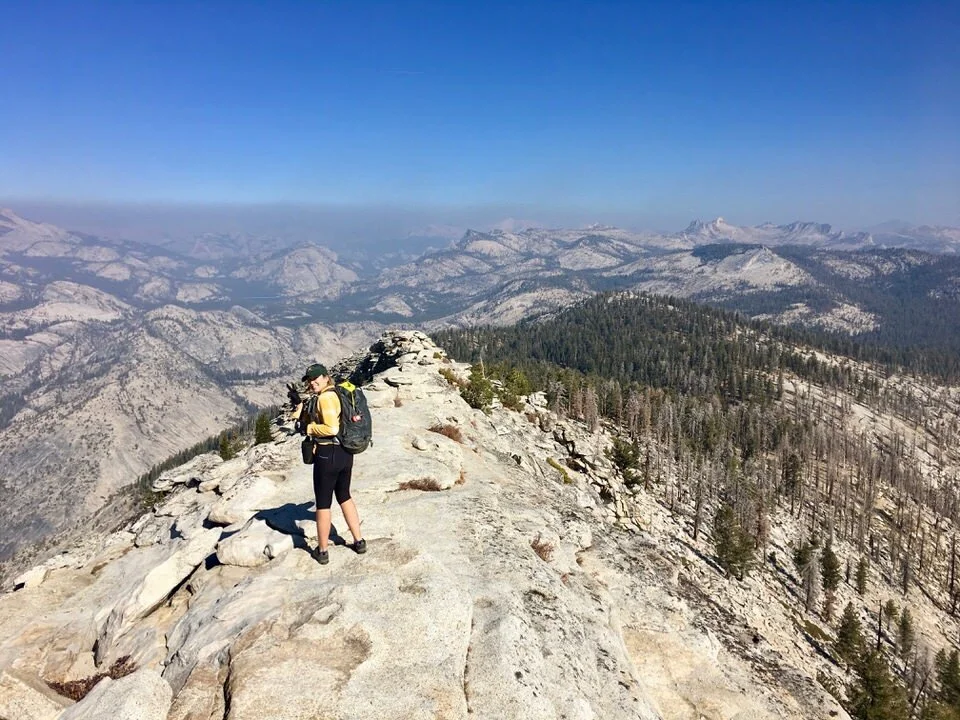
Guarding the summit is a narrow ridge with steep drop-offs, but if you move slowly and watch your step, you will successfully navigate to the summit of Clouds Rest. I didn’t find this too scary, there felt like plenty of room to safely walk, but if you’re scared of heights then this might be a bit scary for you and you may want to consider another one of Yosemite’s hikes.
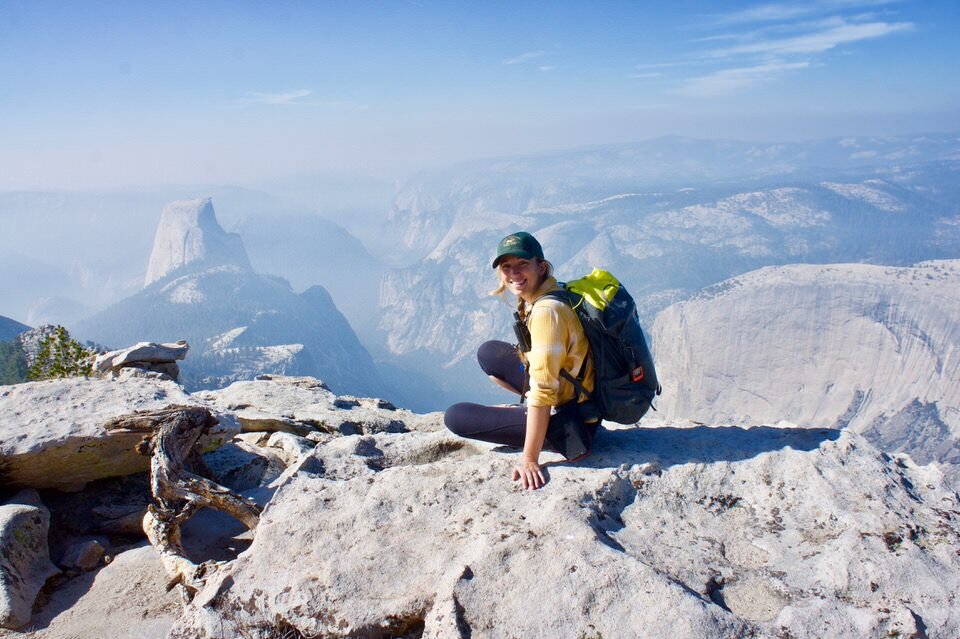
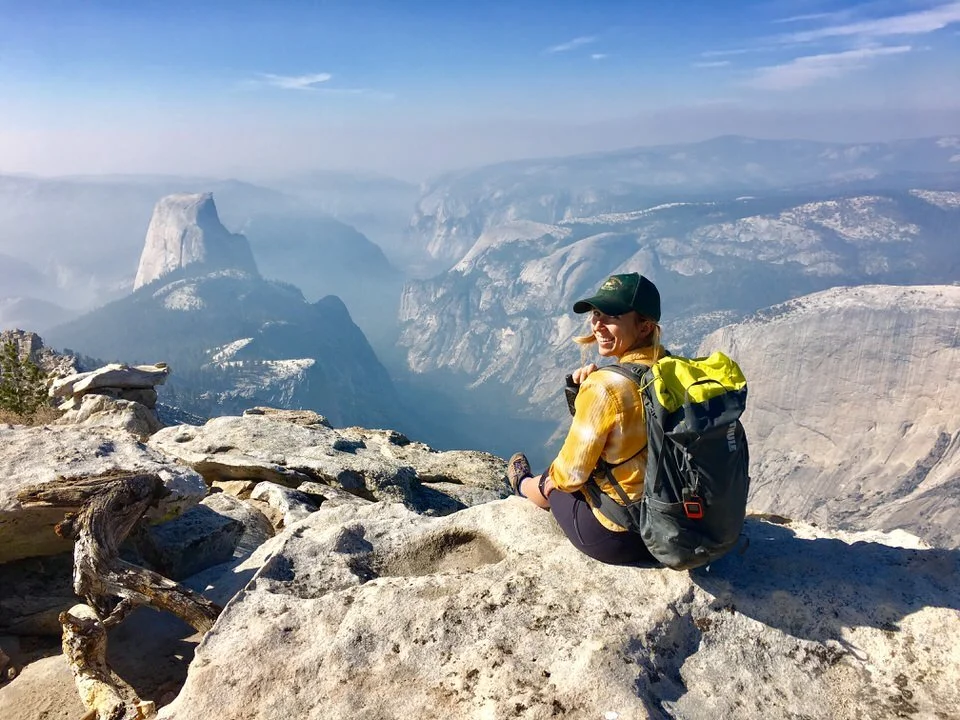
Make sure to spend some quality time up there enjoying the views of Yosemite Valley in all directions! And don’t forget to get a picture of Half Dome from above.
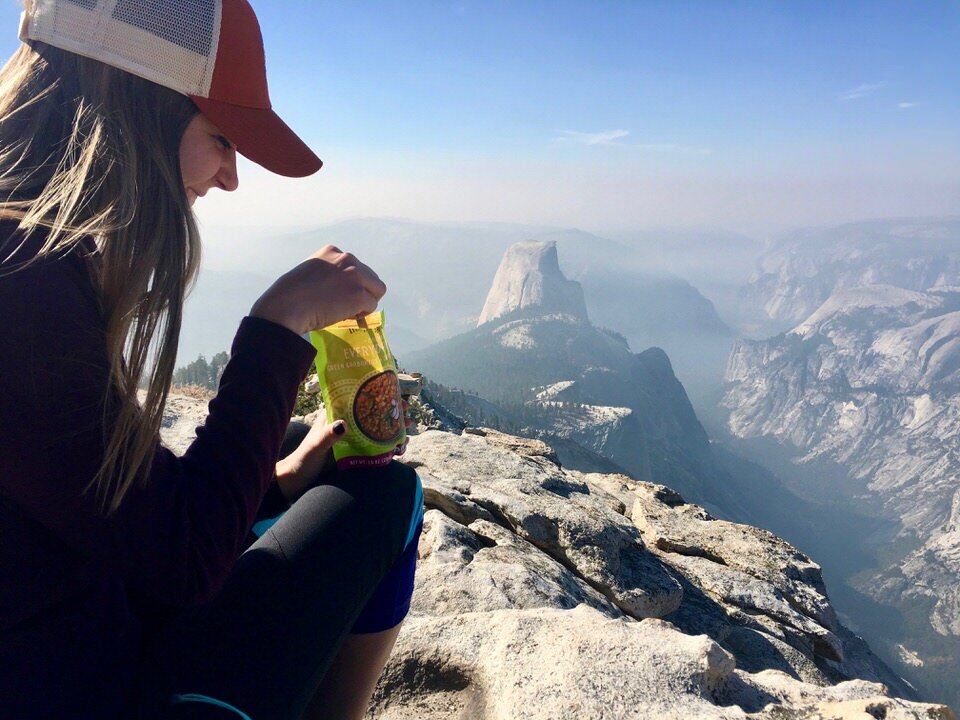
After you’ve savored the summit, it’s time to head back down and retrace your steps back to the trailhead. Unfortunately, you’ll face a few uphill sections on the way back, so you’ll definitely want a snack on the summit and hearty meal once you make it back to camp.
PRO TIPS
If you want to have a little bit of solitude and avoid the standard Yosemite crowds, you should try to get up and get on the Clouds Rest trail as early as possible. If you have the option to hike Clouds Rest on a weekday, you’ll definitely encounter fewer people on the trail. Also, hiking Clouds Rest in the fall is less popular than in the summer, so choosing to do it then is another way to dodge the crowds.
8. IMPORTANT CLOUDS REST SAFETY TIPS
While Clouds Rest is not a highly technical hike, you still might encounter some potential dangers on the trail. It is important to be prepared for these hazards in order to help mitigate them and keep yourself safe on this hike.
HIGH EXPOSURE ON THE RIDGE
If you’re afraid of heights or exposure, the ridge at the top of Clouds Rest might make you really nervous.
Although it is quite narrow and the drop-off on the north side is definitely sheer, as long as you watch your step and move carefully, I really didn’t find it to be too crazy. It’s certainly less intimidating than the cables on Half Dome. But you know yourself best and whether you’ll be comfortable with something like this!
SNOW
It is much more dangerous to hike Clouds Rest when there’s snow on the trail, which can happen early and late in the season.
Before you attempt this hike, make sure to check trail condition reports to determine if the snow has melted (early in the season) or if snow is coming in (late in the season). And always check the weather report for the planned day of your hike, too! The narrow ridge at the top can feel much more precarious in slippery conditions.

STAYING HYDRATED
Hiking Clouds Rest is a long and strenuous undertaking, and it’s crucially important to bring enough water to complete the out and back trip.
You won’t find any reliable sources to refill water along the trail, so you’ll need to carry all of your water with you from the trailhead. In the summer, when it’s extra hot out, you’ll need to factor that in and bring extra water as well.
WILDLIFE
Yosemite is filled with a variety of wildlife, but the biggest concern is black bears. Usually, black bears are scared and skittish around humans, but the Yosemite bears are often bolder since they are more accustomed to seeing people around.

As with all bears, you should practice safe bear principles including (but not limited to) the following:
Make noise while you hike so wildlife is never startled by your presence.
Always keep your distance if you see a bear. Don’t be going for any selfies!
Never run from a bear.
Always store your food (and any other scented items) at night in either a bear box or bear canister.
Bear spray is NOT allowed within the Yosemite park boundaries. Just be smart, make noise while you hike, and you’ll likely avoid a bear encounter.
It’s also very important to not leave food in your parked car. Bears are smart, and the ones in Yosemite have learned what coolers look like and that they can usually find food inside them. Bears are commonly known to break into cars in Yosemite Valley when they see a cooler or smell food inside. You will find bear lockers at most parking lots, so keep any food you’re not taking with you on the hike in there.
Here’s some more info about bears in Yosemite from the National Park Service.
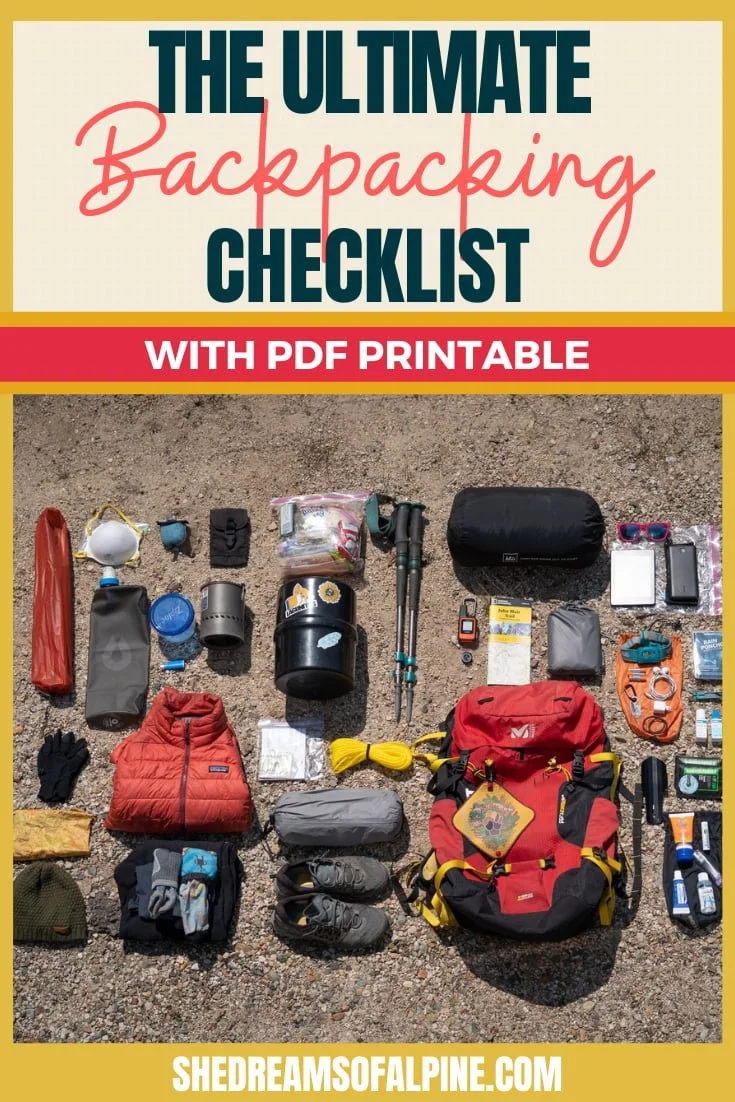
9. WHAT TO BRING ON YOUR CLOUDS REST HIKE
To prepare and pack for day hiking Clouds Rest, I’d love for you to pop over to my day hiking gear checklist and make sure you have everything you need for a day hike.
You can also check out my day-hiking packing list video below for a quick overview:
Here are a few absolutely essential items I want to make sure you have ready to go when you’re heading out on your Clouds Rest hike:
2) Water Bladder – Since you need to bring all your water with you on the Clouds Rest hike, it’s really useful to have water bladder like a Camelbak (3 Liter capacity) that you can put in in your pack and easily drink from along the trail without needing to stop.
3) Headlamp – It’s important to get an early start to hike Clouds Rest, which means you might be starting in the dark. And just in case your adventure doesn’t go as planned, you should always bring a headlamp + extra batteries on every hike. I’m a fan of the Petzl Bindi Headlamp for a lightweight day-hiking option.
4) GPS Device – It’s always smart to at least use the Gaia GPS App for peace of mind, even if you don’t have a dedicated handheld GPS device.
5) Water Filter – Although there are no reliable water sources on the Clouds Rest Trail, you might discover a few running streams, and it’s a good idea to bring a backup water filter just in case of emergency. Potable Aqua Water Purification Tablets are a nice and lightweight emergency option.
6) Down Jacket – Even on a hot day, always pack an emergency down jacket. like the Patagonia Down Sweater or the Patagonia Nano Puff (or other similar jackets).
7) Snacks – Don’t forget to bring plenty of food to fuel your body on this tough day hike! I like Kate's Real Food Bars , and a mix of salty and sweet options gives you a choice when you’re not sure what you’ll be craving. I also recommend bringing some Nuun tablets for electrolytes.
Again, these are the essentials, but not a comprehensive packing list for your day hike of Clouds Rest. Check out my day hiking checklist for my entire list of gear recommendations!
DOWNLOAD OUR HIKING PACKING CHECKLIST:
So that you can hit the trails with peace of mind knowing that you didn’t leave anything essential behind!
Now it’s time for you to take all your newfound knowledge and go experience Clouds Rest for yourself! Although it is a long and strenuous hike, the views at the summit are worth every hard-earned step.
LOOKING FOR MORE EPIC CALIFORNIA HIKING ADVENTURES?
If you are looking for additional California hiking adventures, check out our resources below:
ESSENTIAL HIKING (OR BACKPACKING) RESOURCES
Also be sure to check out these essential hiking resources!
7 Tips to Hiking and Summitting Your First Fourteener Mountain
California backpacking permit process for popular trails and campsites
Cheers,
Allison - She Dreams of Alpine


15 Incredible Joshua Tree Hikes to Explore the Desert | Entering Joshua Tree National Park is like landing on another planet – the landscape of rock formations and gnarled Joshua trees is simply otherworldly. To fully explore this crazy cool desert landscape, you’ll want to try one of these 15 amazing Joshua Tree hikes in the park. | shedreamsofalpine.com