7 Tips to Hiking and Summiting Your First Fourteener Mountain

Right off the bat, you might be wondering, what is a 14er? A “fourteener” or 14er is a type of mountain that is at least 14,000 feet in total elevation. Also, to be considered a true 14er, it is widely accepted that the 14er must also have at least 300 feet of prominence.
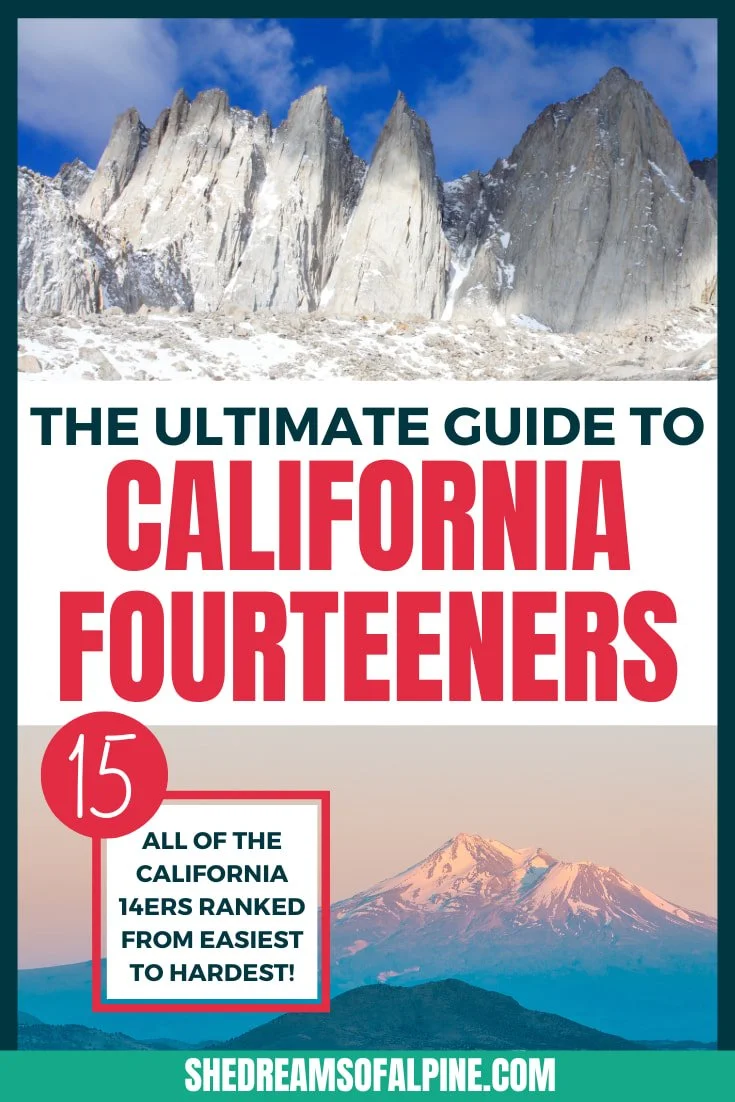
In the United States, there are 96 total peaks that are commonly classified as 14ers. Colorado has the most, with 53 total. Alaska is in second, with 29 peaks over 14,000 feet – it also has the tallest peak in the United States (Denali). There are 12 “true” California 14ers, with Mount Whitney being the tallest peak in the contiguous United States. Then there are 2 14ers in Washington state.
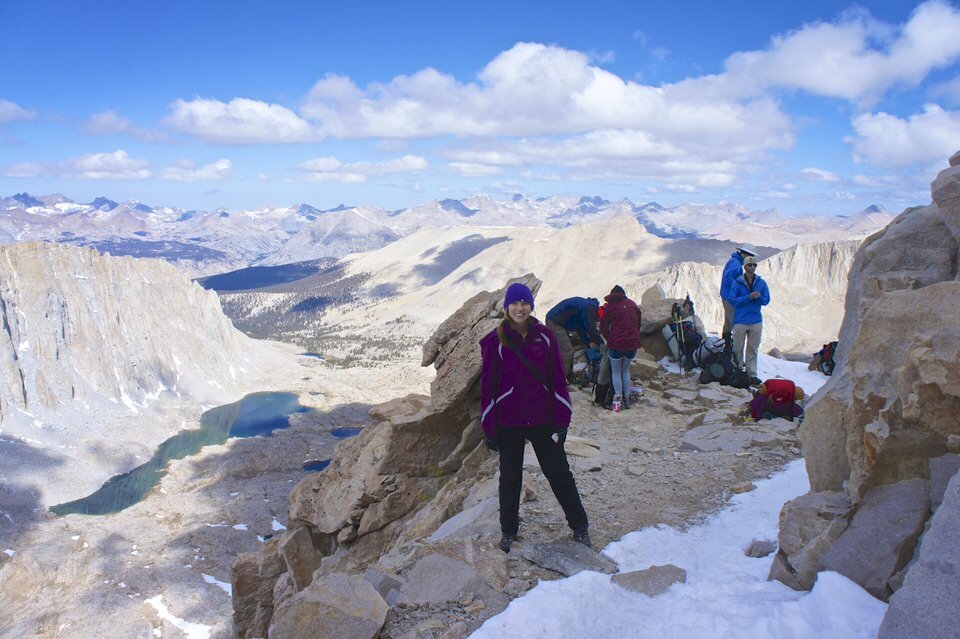
I remember when I first moved out to California, hearing about the California 14ers and thinking, “Wow, maybe one day I will be able to do that.” That one day came sooner than I thought! I met some friends who essentially convinced me to start mountaineering with them, even though I had never gone before, and one of my first mountaineering trips also happened to be my first California 14er, Mount Whitney via the Mountaineers Route.
Was I prepared for it? Not nearly enough! But it taught me so much about what it takes to get ready for hiking big mountains, and I haven’t looked back ever since. Since then, I have hiked Mount Rainier, Mount Shasta, White Mountain, Mount Langley, and attempted a summit of Grays Peak in Colorado.
So if you’re just getting started and want to summit your first 14er, here are 7 of my personal tips to help guide you to your best chance of success when hiking a 14er.
Note: this post may contain affiliate links.
GRAB MY [FREE] OUTDOOR BACKPACKER STARTER KIT
I created the Ultimate Outdoor Backpacker Starter Kit for you (and it's FREE)! This starter kit is filled with 14 pages of my best hiking and backpacking tips to help you learn what it takes to become a safe, confident, and self-sufficient outdoor backpacker!

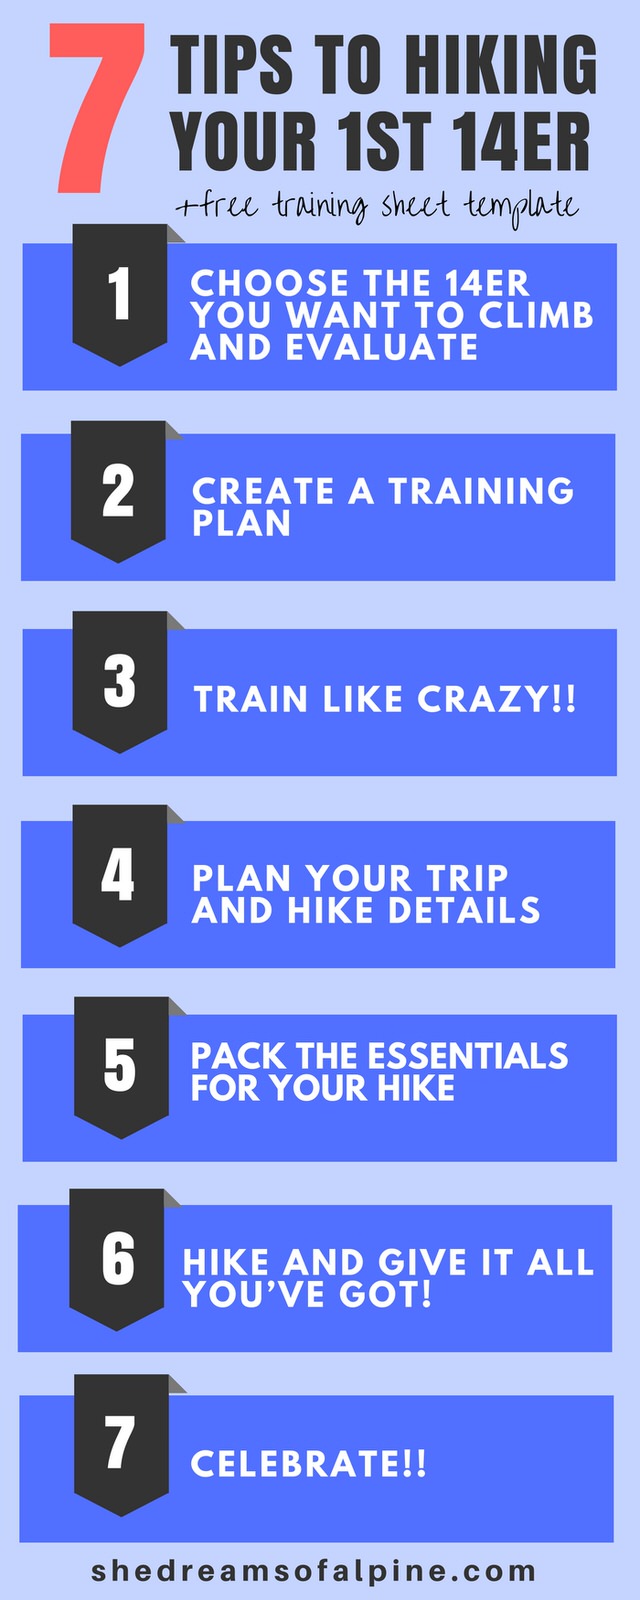
1) Choose the 14er You Want to Climb and Evaluate Your Objective
Not all 14ers are created equal. Some can be climbed in a day, and some should be backpacked over a few days. Some 14ers are technical and may require additional skills like mountaineering or rock climbing, but other 14ers have a defined trail all the way to the summit.
Take into consideration your skill level and do a lot of research before choosing your first 14er. I would recommend hiking a 14er that is “Class 1” for your first 14er, which means it is not technical and can be hiked without additional gear.
Let me use California 14ers as an example. White Mountain is probably the “easiest” California 14er. The trailhead starts around 12,000 feet, there is only about 3,000 feet of elevation gain total, and there is an easy to follow trail all the way to the summit.
Mount Langley is also considered an “easier” 14er, but it has a lot more mileage than White Mountain, so you might want to backpack this hike (although many people do it in one day, too). There are some very minor technical route-finding skills you may need on Langley, but if you are prepared ahead of time, it shouldn’t be an issue.
Finally, Mount Whitney is also considered an “easier” 14er since it is so accessible, and there is a trail all the way to the summit. However, Whitney can be a brutal first 14er due to its intense amount of elevation gain and mileage. If you choose it for your first, I also recommend backpacking it. I think a lot of newbies underestimate how much actual gain there is on Mount Whitney, and will not reach summit because they tried to do a day push of the peak.
If you are in Colorado, Alaska or Washington, just be sure to do your research before choosing a summit.
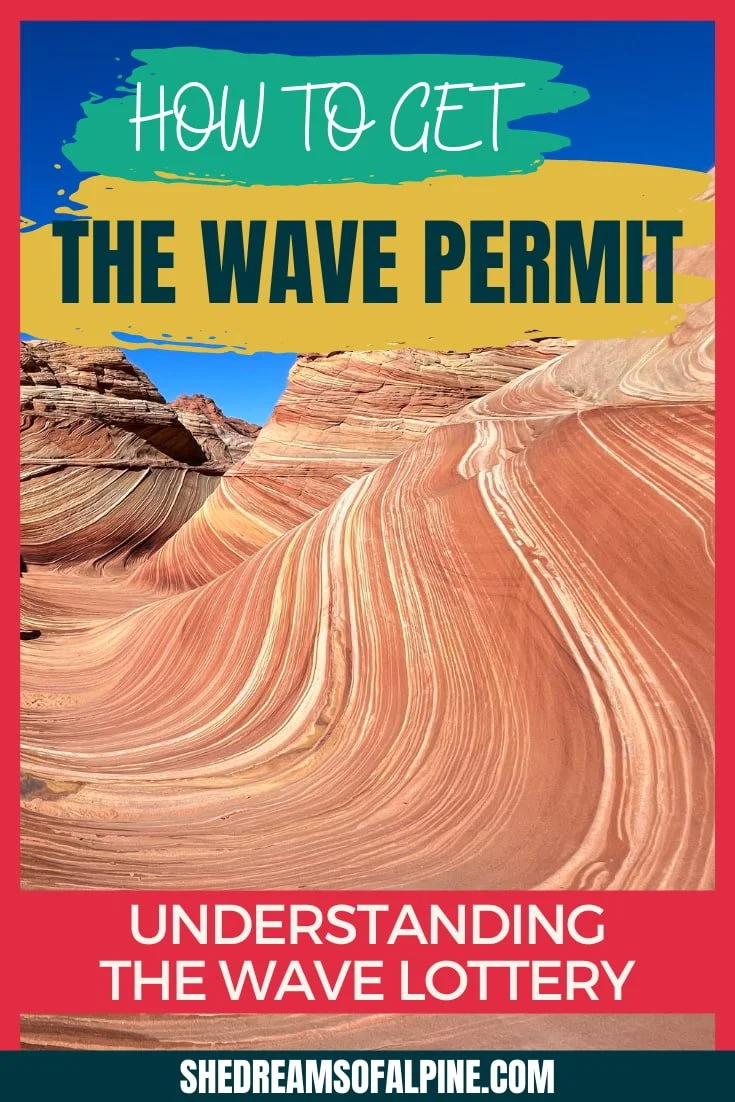
Another thing to consider when picking your 14er is to check if you need permits to hike or not. Many of the California 14ers require permits in order to have access to hike the trails, and I imagine it is similar for many peaks in Colorado, Washington, and Alaska.
If hiking a 14er is on your list of goals this year, check if you need permits way ahead of time, because some peaks like Mount Whitney have a very competitive permit lottery system. White Mountain, on the other hand, does not require any permits to hike.
Sometimes you can get “walk-in” permits the day before or day of a hike, but then you are taking more of risk because it isn’t guaranteed you’ll get in. However, I have had many friends who were able to snag Whitney permits the day before their hike with this walk-in system. I usually prefer to reserve things in advance.
Will you do your 14er hike as a one day push or will you make it a backpacking trip? Often this depends on your fitness level, so you should consider what distances have you hiked in the past. If you have only hiked 5 miles total ever, you may want to backpack your first 14er. Yes, you’ll have to carry more weight on the hike in, but you’ll also get to break up the mileage and elevation gain into multiple days.
You also may choose to backpack a mountain in order to enjoy the backcountry more, like my friend Cara and I did for Mount Langley, it’s such a beautiful hike, and we wanted to spend more time in the wilderness to savor it.

You might also consider backpacking if you want to minimize your chances of getting altitude sickness. Altitude sickness is no joke and can be a big reason why people don’t summit their first attempted 14er.
A good way to mitigate altitude sickness is to help your body acclimate to different elevations. Backpacking is helps with that because you break your hike and elevation gain up.
If you want to hike your first 14er in a one day push, make sure that you are in great physical condition, and possibly consider a 14er that has less mileage and elevation gain. Don’t forget, summiting a 14er is only half the adventure, you still have to have energy to make it back down safely to your car.
I definitely recommend hiking a 14er with a friend or two for your first time. It’s really great to have a team to help get you through the tough parts of the hike and encourage you to the summit.
However, be selective with who you pick. Make sure they are dedicated to train for the hike. The last thing you want is to get to your “hike day” and have your friends bail on you or, even worse, they attempt the hike with you but give up way too early because they didn’t prepare at all.
Obviously, there are reasons for turning around that can happen to anyone, like altitude sickness, but don’t let a lack of preparation, or your friend’s lack of preparation, be what keeps you from summiting your first 14er!
Finally, to summarize, here are the things to consider when you are deciding on a 14er to hike:
How many miles round trip is the hike?
How much total elevation gain is there on the hike (total elevation gain is all the ups along the whole hike, so don’t just subtract the peak elevation from trailhead elevation, oftentimes there is much more elevation gain than just that)
Do you need permits?
Will you hike the peak in one day or will you backpack it?
Who are you hiking with?

2) Create a Training Plan
Ok, assuming you’ve picked a 14er, now it’s time to think about training and preparing your body for the elevation gain and mileage you will be subjecting it to when hiking a 14er. You can get as complicated or simple with your training as you’d like.
There are a lot of good training resources, but if you want to keep it simple, here are a few things I suggest:
Start training 3-5 months out from your big summit. If you are already a pretty active hiker, then training shouldn’t be too difficult for you. What you want to focus on is making sure you are adapting our body to lots of mileage and elevation gain. You should make a plan to increase your weekly mileage and elevation gain over time during your training.
Here’s an example - let’s say your big 14er hike is 15 miles round trip with 3,000 feet of elevation gain. So over the course of the next few months, make sure your total weekly training mileage is more than 15 miles, and just keep increasing it with time.
This is a really simple example, which can either be done on a treadmill or on a local trail you have near where you live:
Weeks 1-4
3-4 cardio sessions per week with 3-4 miles/session and 500-700 feet of elevation gain minimum + for additional benefit, add on a 10 lb. pack while you exercise
Weeks 5-8
3-4 cardio sessions per week with 5-7 miles/session and 1000-1500 feet of total gain minimum + for additional benefit, add on a 20lb pack while you exercise
Weeks 9-12
3-4 cardio sessions per week with 6-8 miles/session and 1500-2000 feet of total gain minimum + for additional benefit, add on a 30lb pack while you exercise
Summit time!
Though this example is really simplified, you get the gist. You want to increase your mileage and gain each week, and slowly adapt your body to the strains. It can also be beneficial to add in some leg exercises as well, like lunges and squats to build your leg muscles further. But, honestly, if a complicated training plan stresses you out, just keep it simple and start hiking more!
Here is a book I recommended reading if you’d like to dig further into training for a big hike:

I even wrote a whole post about using the book to create a training plan, so you can find out more about how that works.
3) Train Like Crazy!
This might be obvious, but after you’ve picked your peak and created your plan, you need to start training for hiking a 14er! Don’t keep putting it off! Before you know it, your hike will be here and training will help you be ready for summit day success.
Get a training partner and keep each other accountable. Start a journal to track your hikes and training details. Track your weekly mileage and elevation gain to make sure you are on track for your summit.
4) Plan the LAST-Minute logistics for Your Trip & Hike
A week or two before hiking a 14er, you should make sure to take care of the little details that you’ve been putting off. Here is what I like to research and plan a couple weeks before any of my hikes:
How are you getting there? Is the trail easily accessible in your car? Do you need a 4x4 vehicle to get to trailhead? Some trails don’t have easy access to the trailhead, and you might even need to take a shuttle to it. Make sure to look into this ahead of time so you can determine how you will get there.
What time do you plan to arrive? It’s often nice to sleep at a higher elevation the night before your hike so you can help your body adapt to elevation. I usually like to drive up the night before a hike and sleep somewhere near the trailhead so that my body can start to acclimatize. If you drive up the same day as your hike, just know that you may experience more effects of altitude sickness.
Is your trail out and back or is it point to point? If you will end up in the same location as your original trailhead, then the car situation is simple. However, some trails start and end at different locations. If that’s the case, you might need to arrange to have two separate cars or some sort of shuttle for your hike.
If you have a permit for the hike, where and when can you pick up the permit? Know the location and the hours that you can pick up your permit, in case it is outside of the time you plan to arrive. Do you need to call ahead to notify the rangers for a late permit pickup or after-hours pickup?
If you are backpacking, do you need a bear canister? And if you don’t own one, do you need to rent one? In California, a lot of trails in the Sierra require you have a bear canister if you are spending any overnight time in the backcountry. Be sure to check out the regulations for your hike.
Does the hike have a reliable water source along the trail? It’s important to do some research and figure this out beforehand. If there is a water source on the trail, consider bringing a water filter with you. If the trail doesn’t have a water source, make sure you pack enough water! A standard recommendation is liter of water for ever 2 hours of hiking, but it really depends on your body and the conditions.
Is it going to be super-hot out? You might need more water than that… but it is also not super practical to carry around 10 liters of water. For White Mountain, which took us about 7-8 hours to hike (15 miles RT and 3400’ of gain), I packed about 4 liters of water.
Hydration is a key part of keeping your body functioning properly on a hike and helping to prevent altitude sickness, so make sure you drink plenty of water on your hike even if it’s cold out or you don’t feel like you need it.
Do you need to buy a map for the trail? I always like to have a physical map, along with downloading a GPX file to load into my GPS.
What is the weather going to be like for your hike? Start checking the forecast a week or two out, and keep checking because it could change. If it looks like some epic weather is in store, you may have to postpone your trip, or maybe you just need to pack a little bit differently. It depends on your experience, comfort zone, the route technicality, etc, but you need to know the forecast to make informed decisions.

5) Pack for Your Hike
Here are just a few of the most important things to bring when hiking a 14er. For a full detailed of all the gear you need for day hiking, check out my Essential Day Hiking Gear List. It has everything you need for a day hike on it!
Also, if you’re hiking a 14er that requires a permit, don’t forget to pack that!
Again, this list isn’t everything you need to pack for your 14er hike. You can download my full Day Hiking Packing List below:
6) Hike and Give It All You’ve Got!
It’s go time! This is the moment you’ve been waiting for – actually hiking a 14er! It’s going to be challenging, and it’s going to take all of your mental and physical strength to get you to the summit and through the hike, but give it all you’ve got. Leave everything on the trail, no regrets.
Make sure to start early enough in the morning so that you can plan to be OFF of the summit before noon. A lot of mountains tend to get afternoon showers and thunderstorms fairly consistently around noon. Check the weather the day of or before your hike, and start early enough in the morning to avoid any thunderstorms.
Here are some other good rules of thumb I like to follow on the day of the hike:
Try to hike at least one full hour before taking any breaks, and when you do take breaks, take shorter 5-10 minute breaks to keep the pace going.
Every break that you take, make sure to eat a little something and drink water. This is also a good time to re-apply sunscreen
If it is really warm outside and your feet are sweating, change your socks and let your sweaty pair get some air on the back of your pack. Dry feet are one of the key ways to prevent blisters!
Listen to your body. If you start feeling too sick, dizzy or nauseous to continue, consider turning around. The peak isn’t going anywhere, and you can come back to try it again. You definitely don’t want to get to a point where you are throwing up or so sick that you can’t even get off the mountain. Don’t rely on other people to help you down, listen to your body and make good judgement calls.
Sign the summit register! If you make it to the top of your first 14er, savor it. Sign the register and enjoy the views for awhile. But don’t forget that getting to the top is only half of the hike, and you still need to make your way back down.

7) Celebrate!
Woo hoo! Whether you summited your first 14er or had to turn around early due to altitude sickness or bad weather or because your body just couldn’t handle it, you should still celebrate hiking a 14er.
Believe me, there have been times I’ve had to turn around 400 feet from a summit due to exhaustion or injury… or perceived ability…. it happens to all of us.
Regardless of the outcome, you should celebrate because you tried. You went out and gave the trails and the mountains all you had. You’ve earned that pizza, or whatever it is you like to celebrate with.
Be proud of yourself. There is so much more reward to hiking a 14er than just reaching the summit. If you’re anything like me, once the pain and soreness has worn off, you’ll begin plotting your next adventure in no time.
Looking for more 14er resources?
Check out these guides to California & Colorado 14ers:
Cheers,
Allison - She Dreams of Alpine

Did you enjoy this post on 7 Tips to Hiking and Summiting Your First Fourteener? Please take a moment to share it on Pinterest or other social media!


Related posts:


The 13 Best Great Basin National Park Hikes | Hiking in Great Basin National Park might fly under the radar compared to other more famous national parks, but that means you can find solitude and escape the crowds while exploring the ruggedly beautiful landscape. Hiking Great Basin National Park provides a variety of options to challenge yourself to summit a peak or simply go for a stroll among ancient trees. This park is a hidden gem, and hiking is one of the best ways to explore it! | shedreamsofalpine.com